Making soy milk — Part 2

I didn’t mean for yesterday’s post to be a teaser.  I really thought I’d actually be writing about making soy milk, but when I sat down to write, there was just too much background and context for one post.  But I’m back and ready to get down to business!
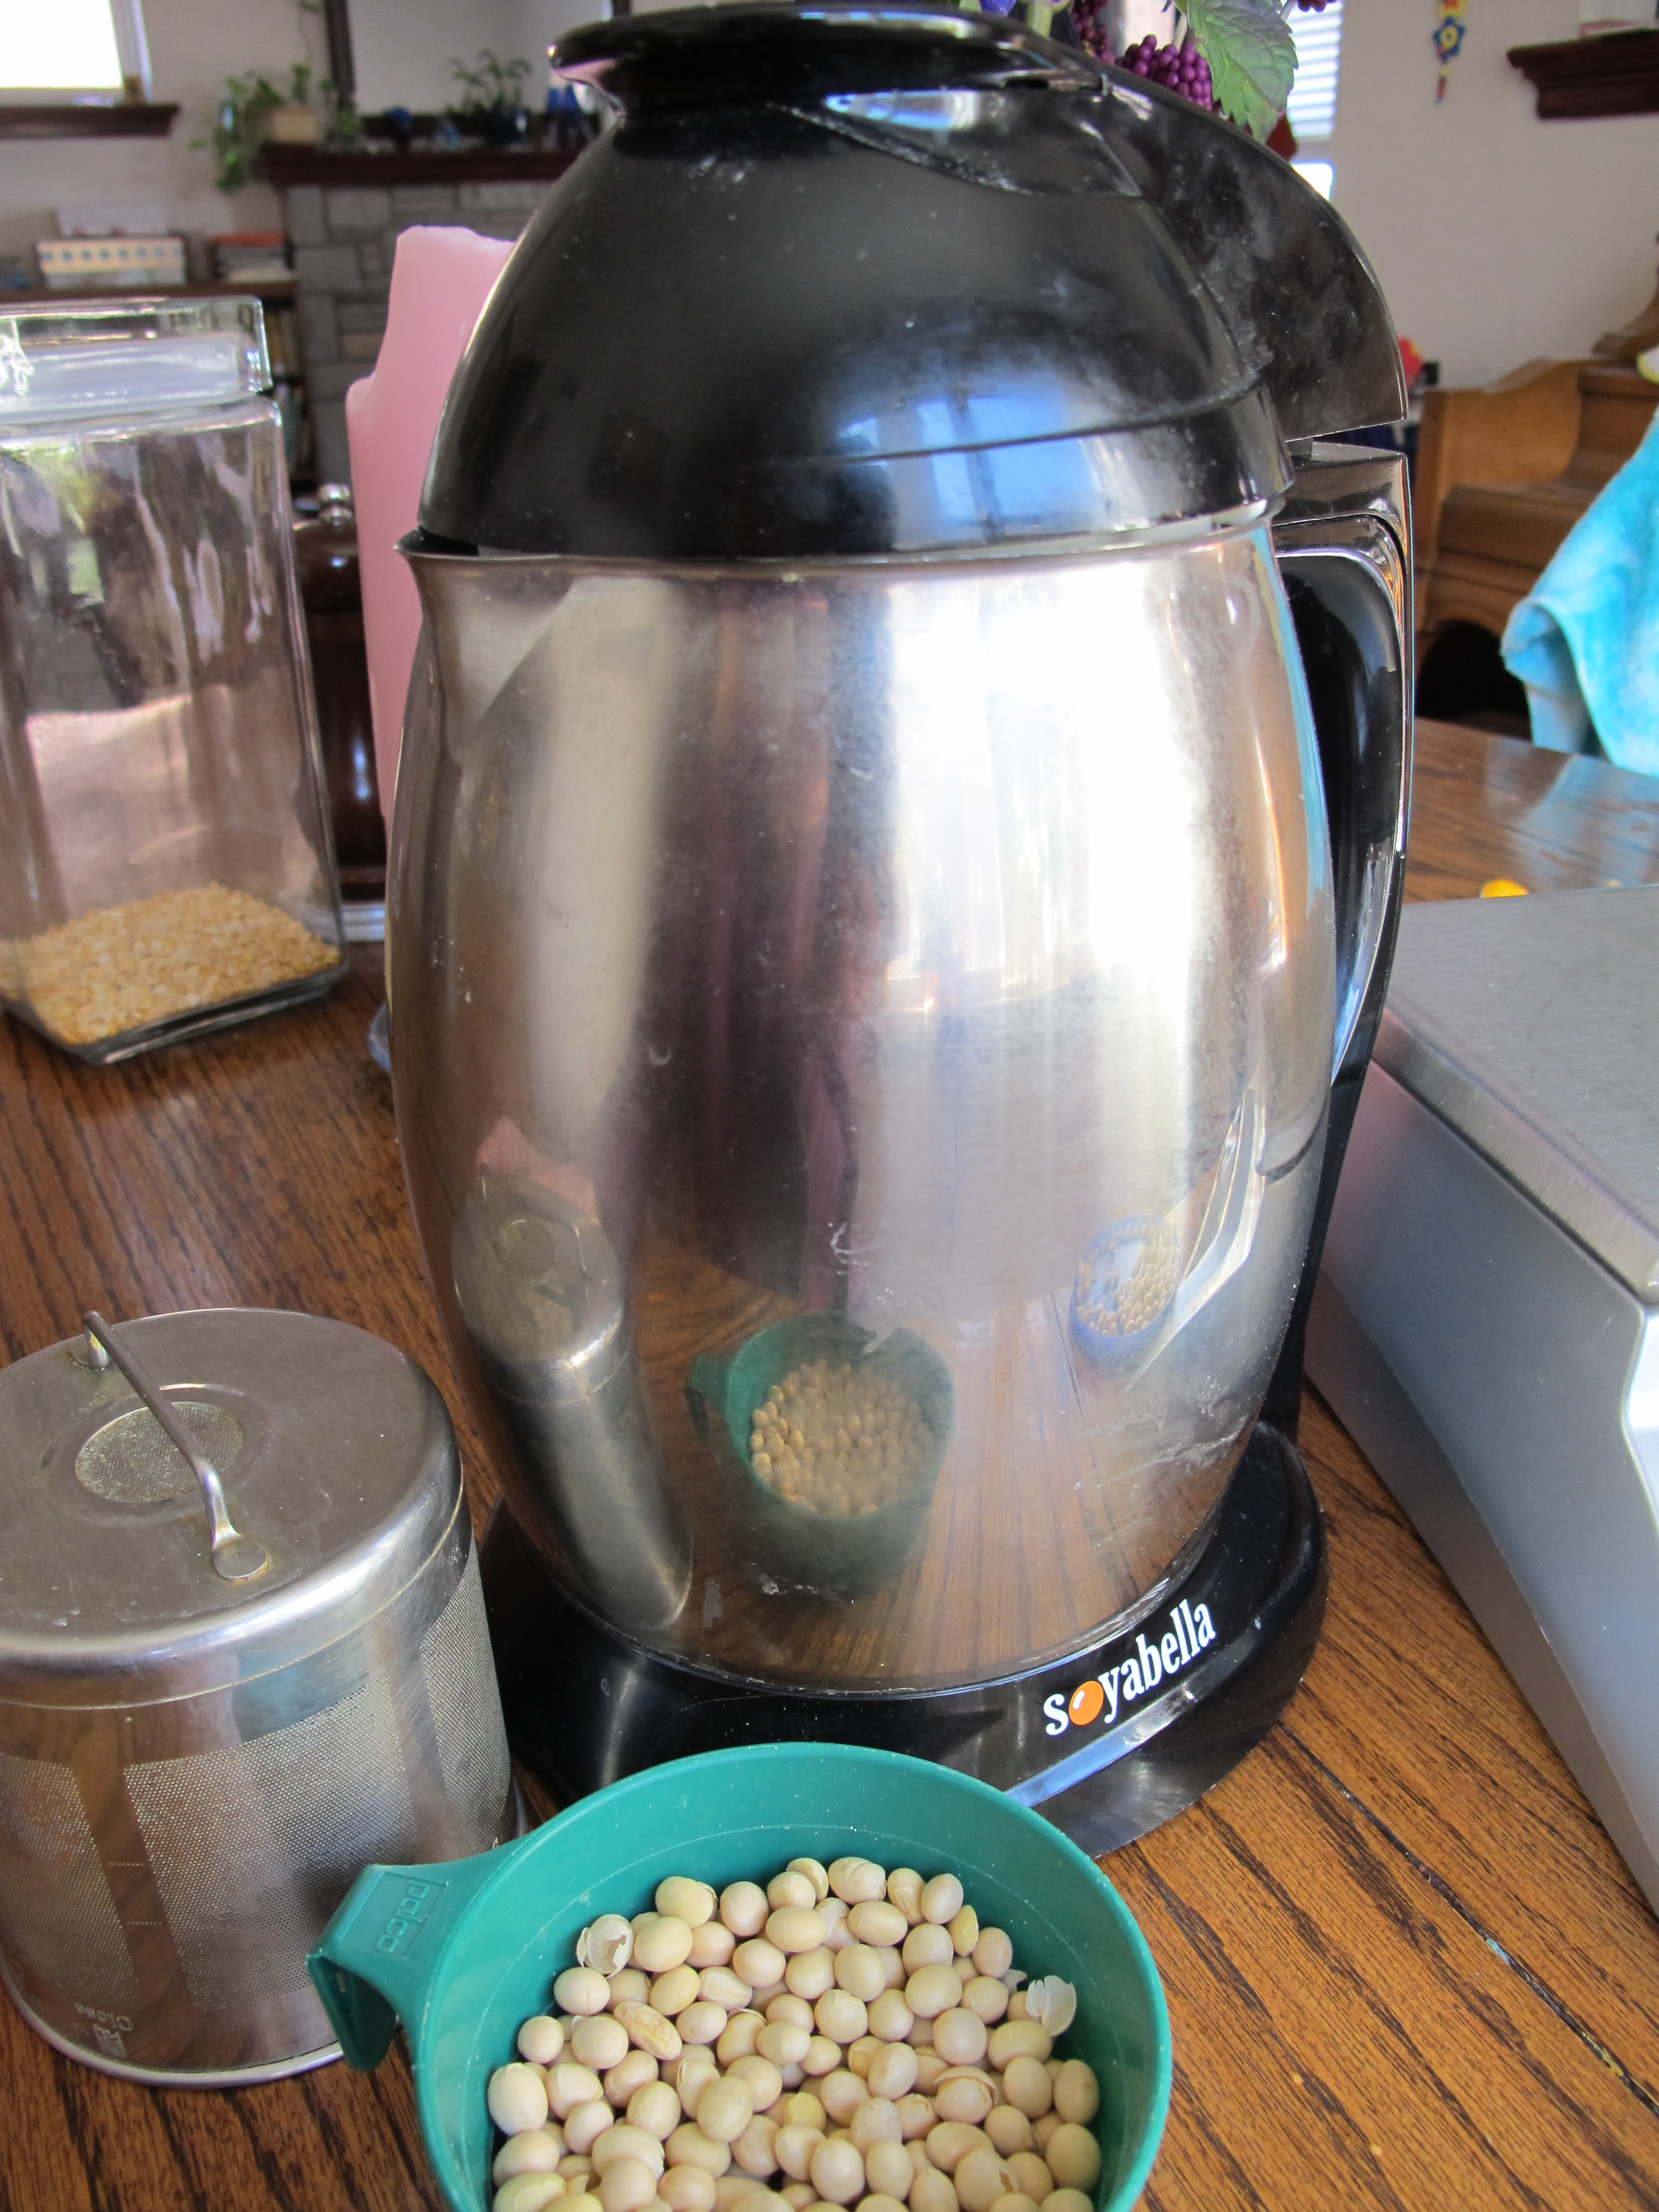
The machine
I borrowed my friend’s Soyabella soy milk maker.  The website has a number of recipes for both soy and nut milks, though you have to go to the product manual to get the weight of soybeans to use for the most basic soy milk recipe.

IMG_6047

Making soy milk
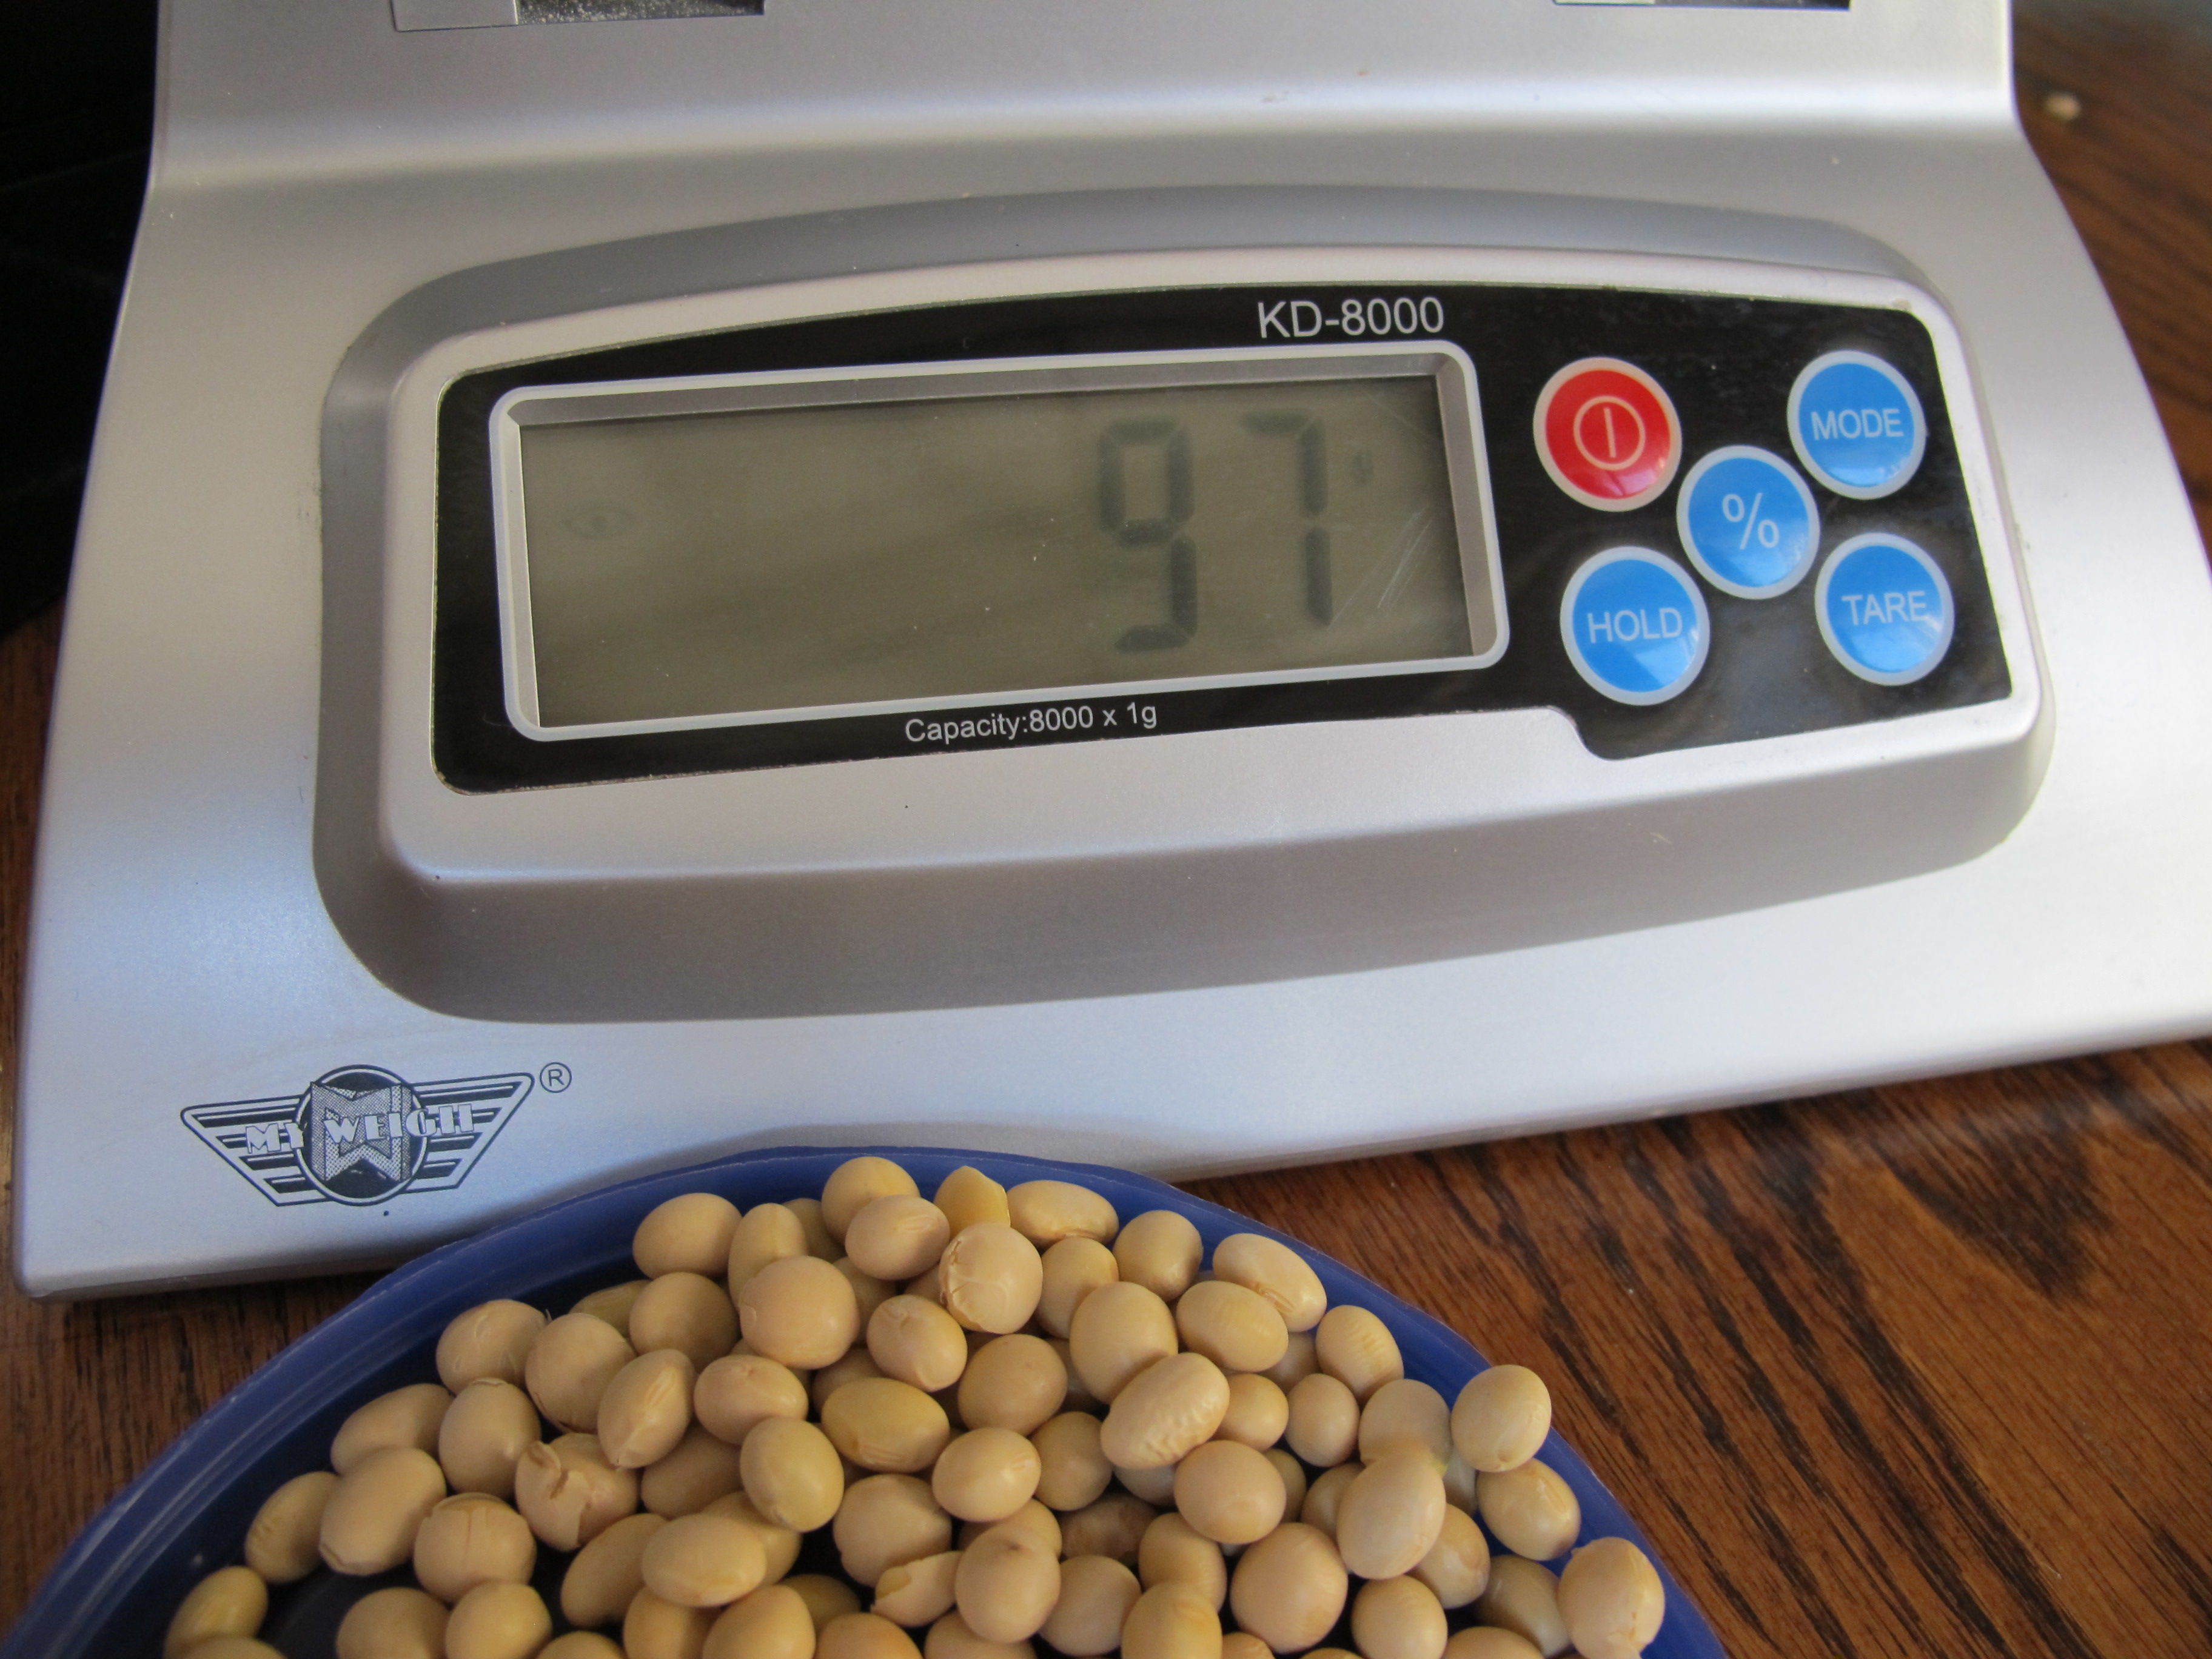
At it’s most basic, soy milk requires soy beans and water.  You start with dried soybeans (available in the bulk section at most natural food stores).  I had not one, but two small bags of old dried soy beans sitting around, from other times I’d intended to make soy milk, but I decided I should start with a fresher product. The Soyabella manual called for 70g-95g (2.5oz-3.5oz) dry soybeans per 1L batch.

IMG_6046

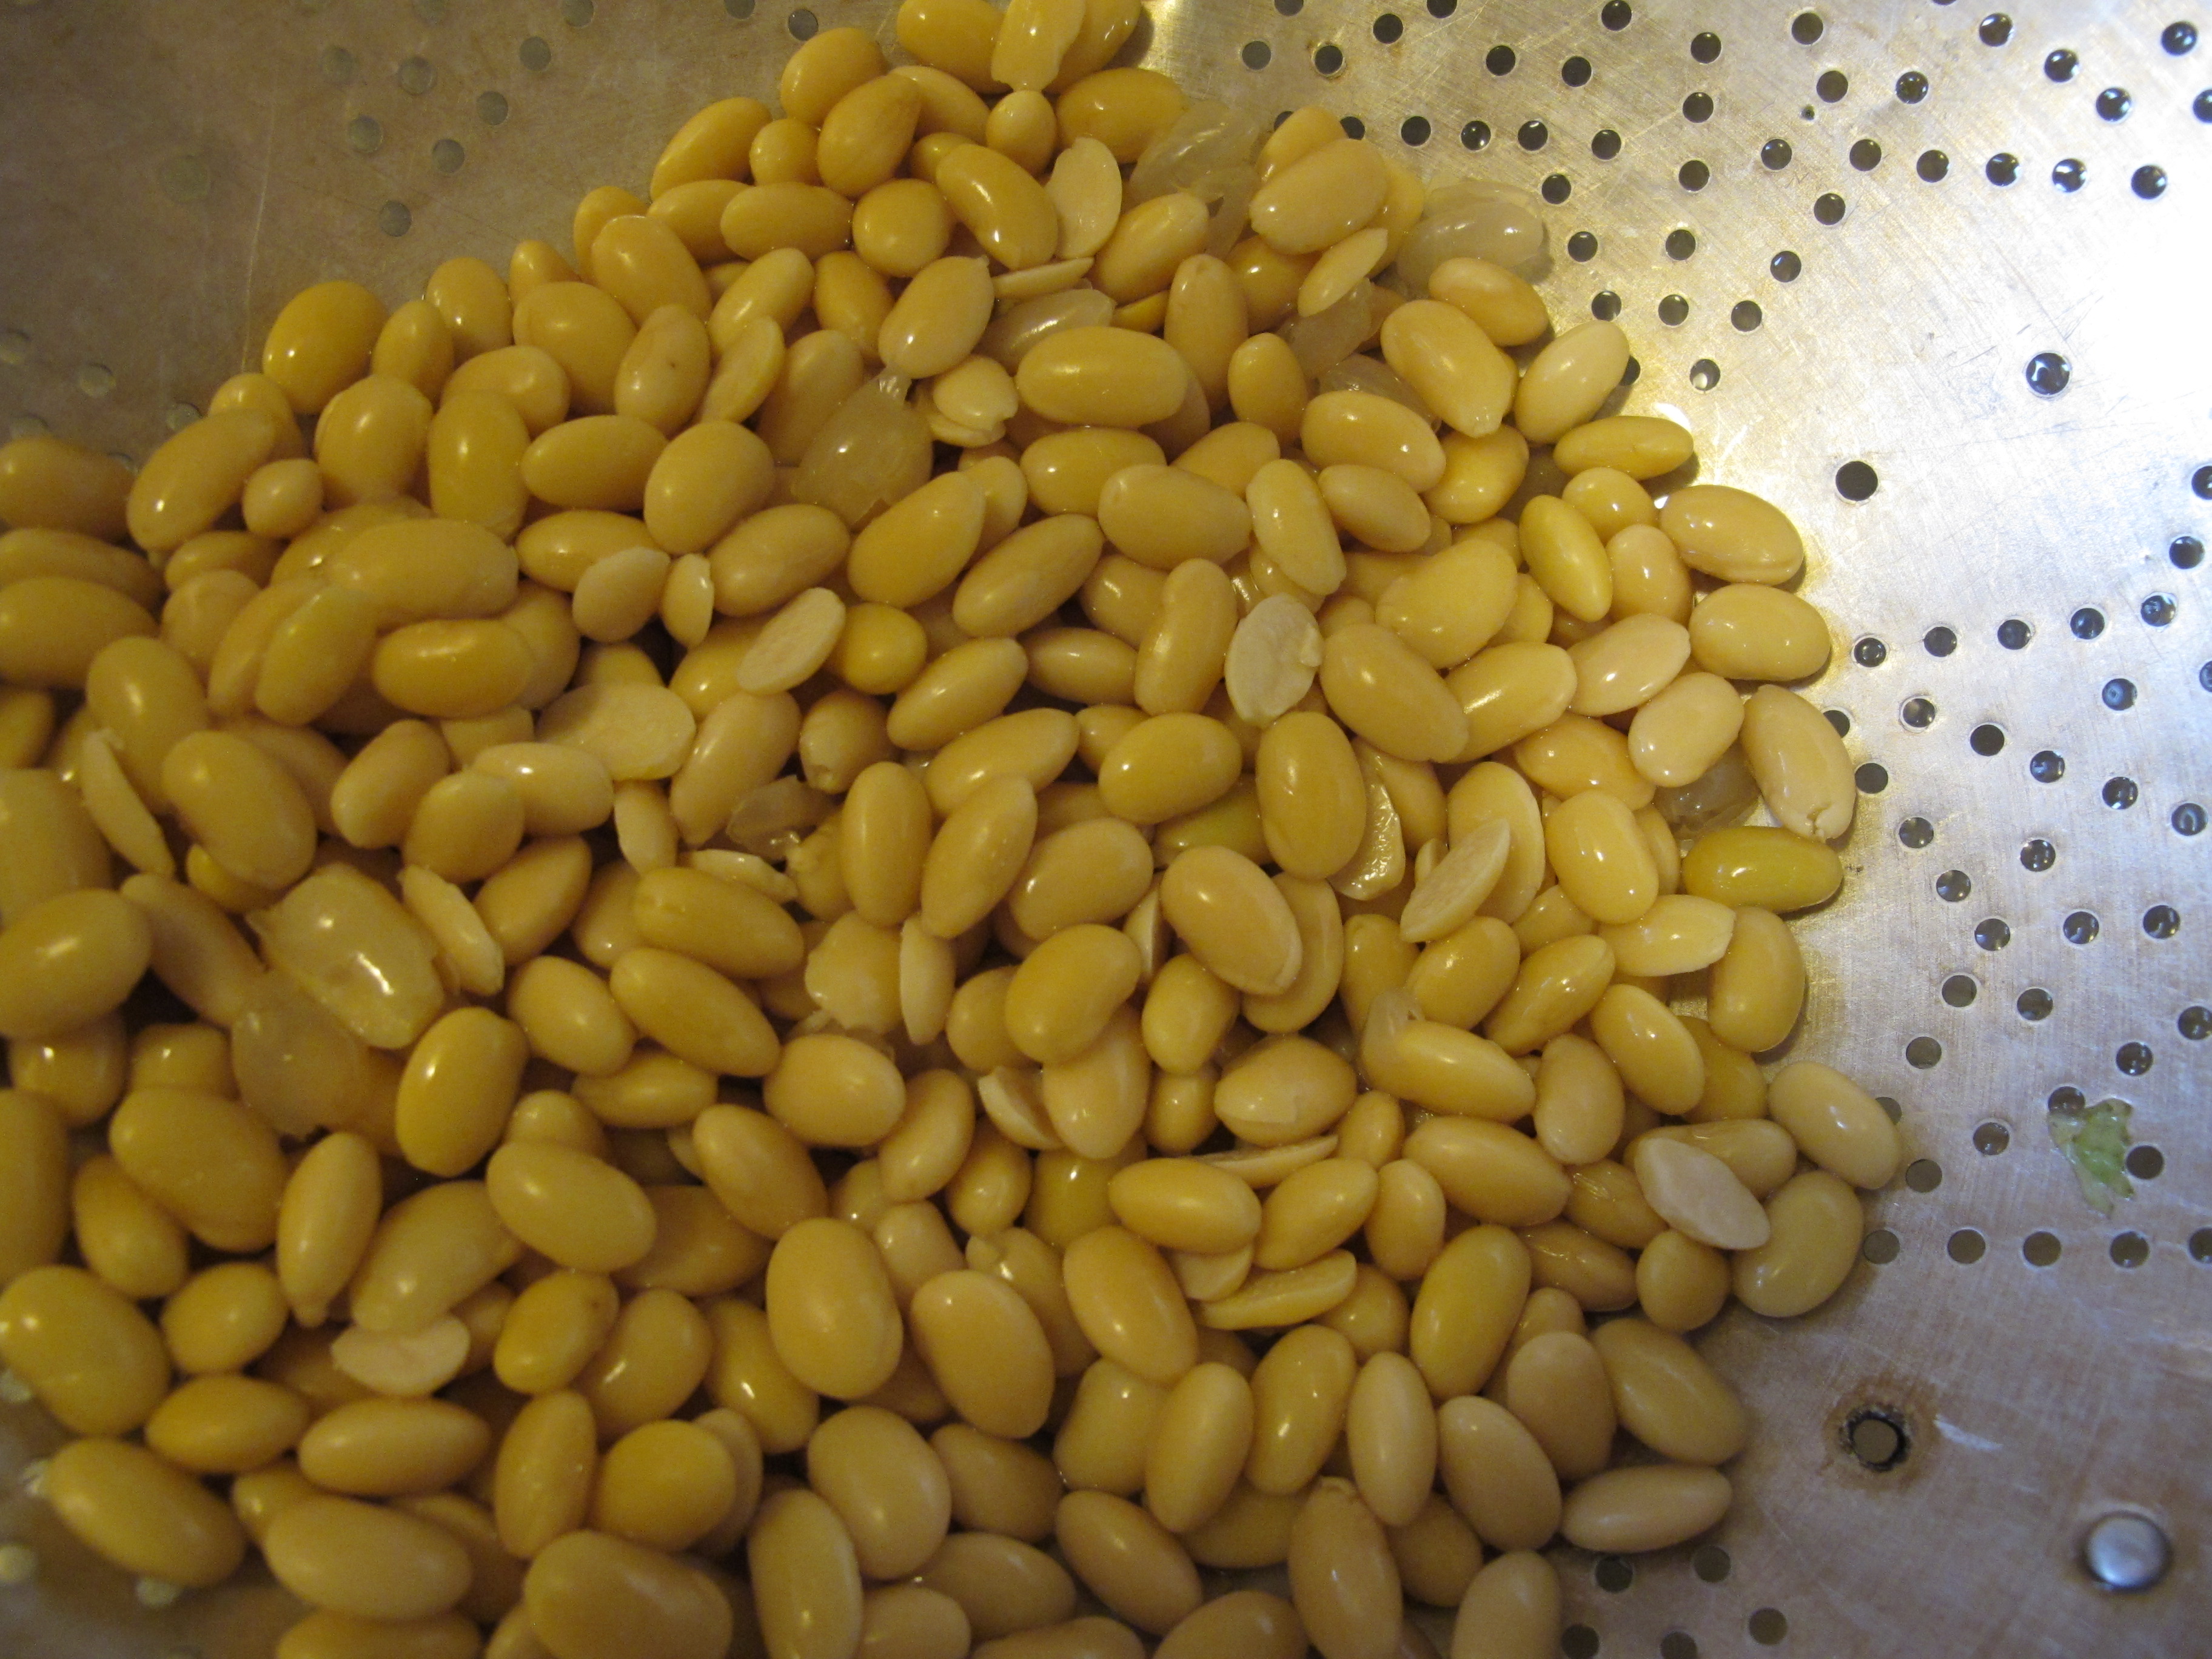
As with all dried beans, the first step is soaking, either a quick soak, or an overnight (at least 8 hour) soak.  Once I had my hands on the machine, I wanted to make soy milk that day, so I went with the quick soak (add enough water to cover beans by an inch, bring to a boil, simmer 2-3 minutes, then remove from heat and soak 2-3 hours).

IMG_6049

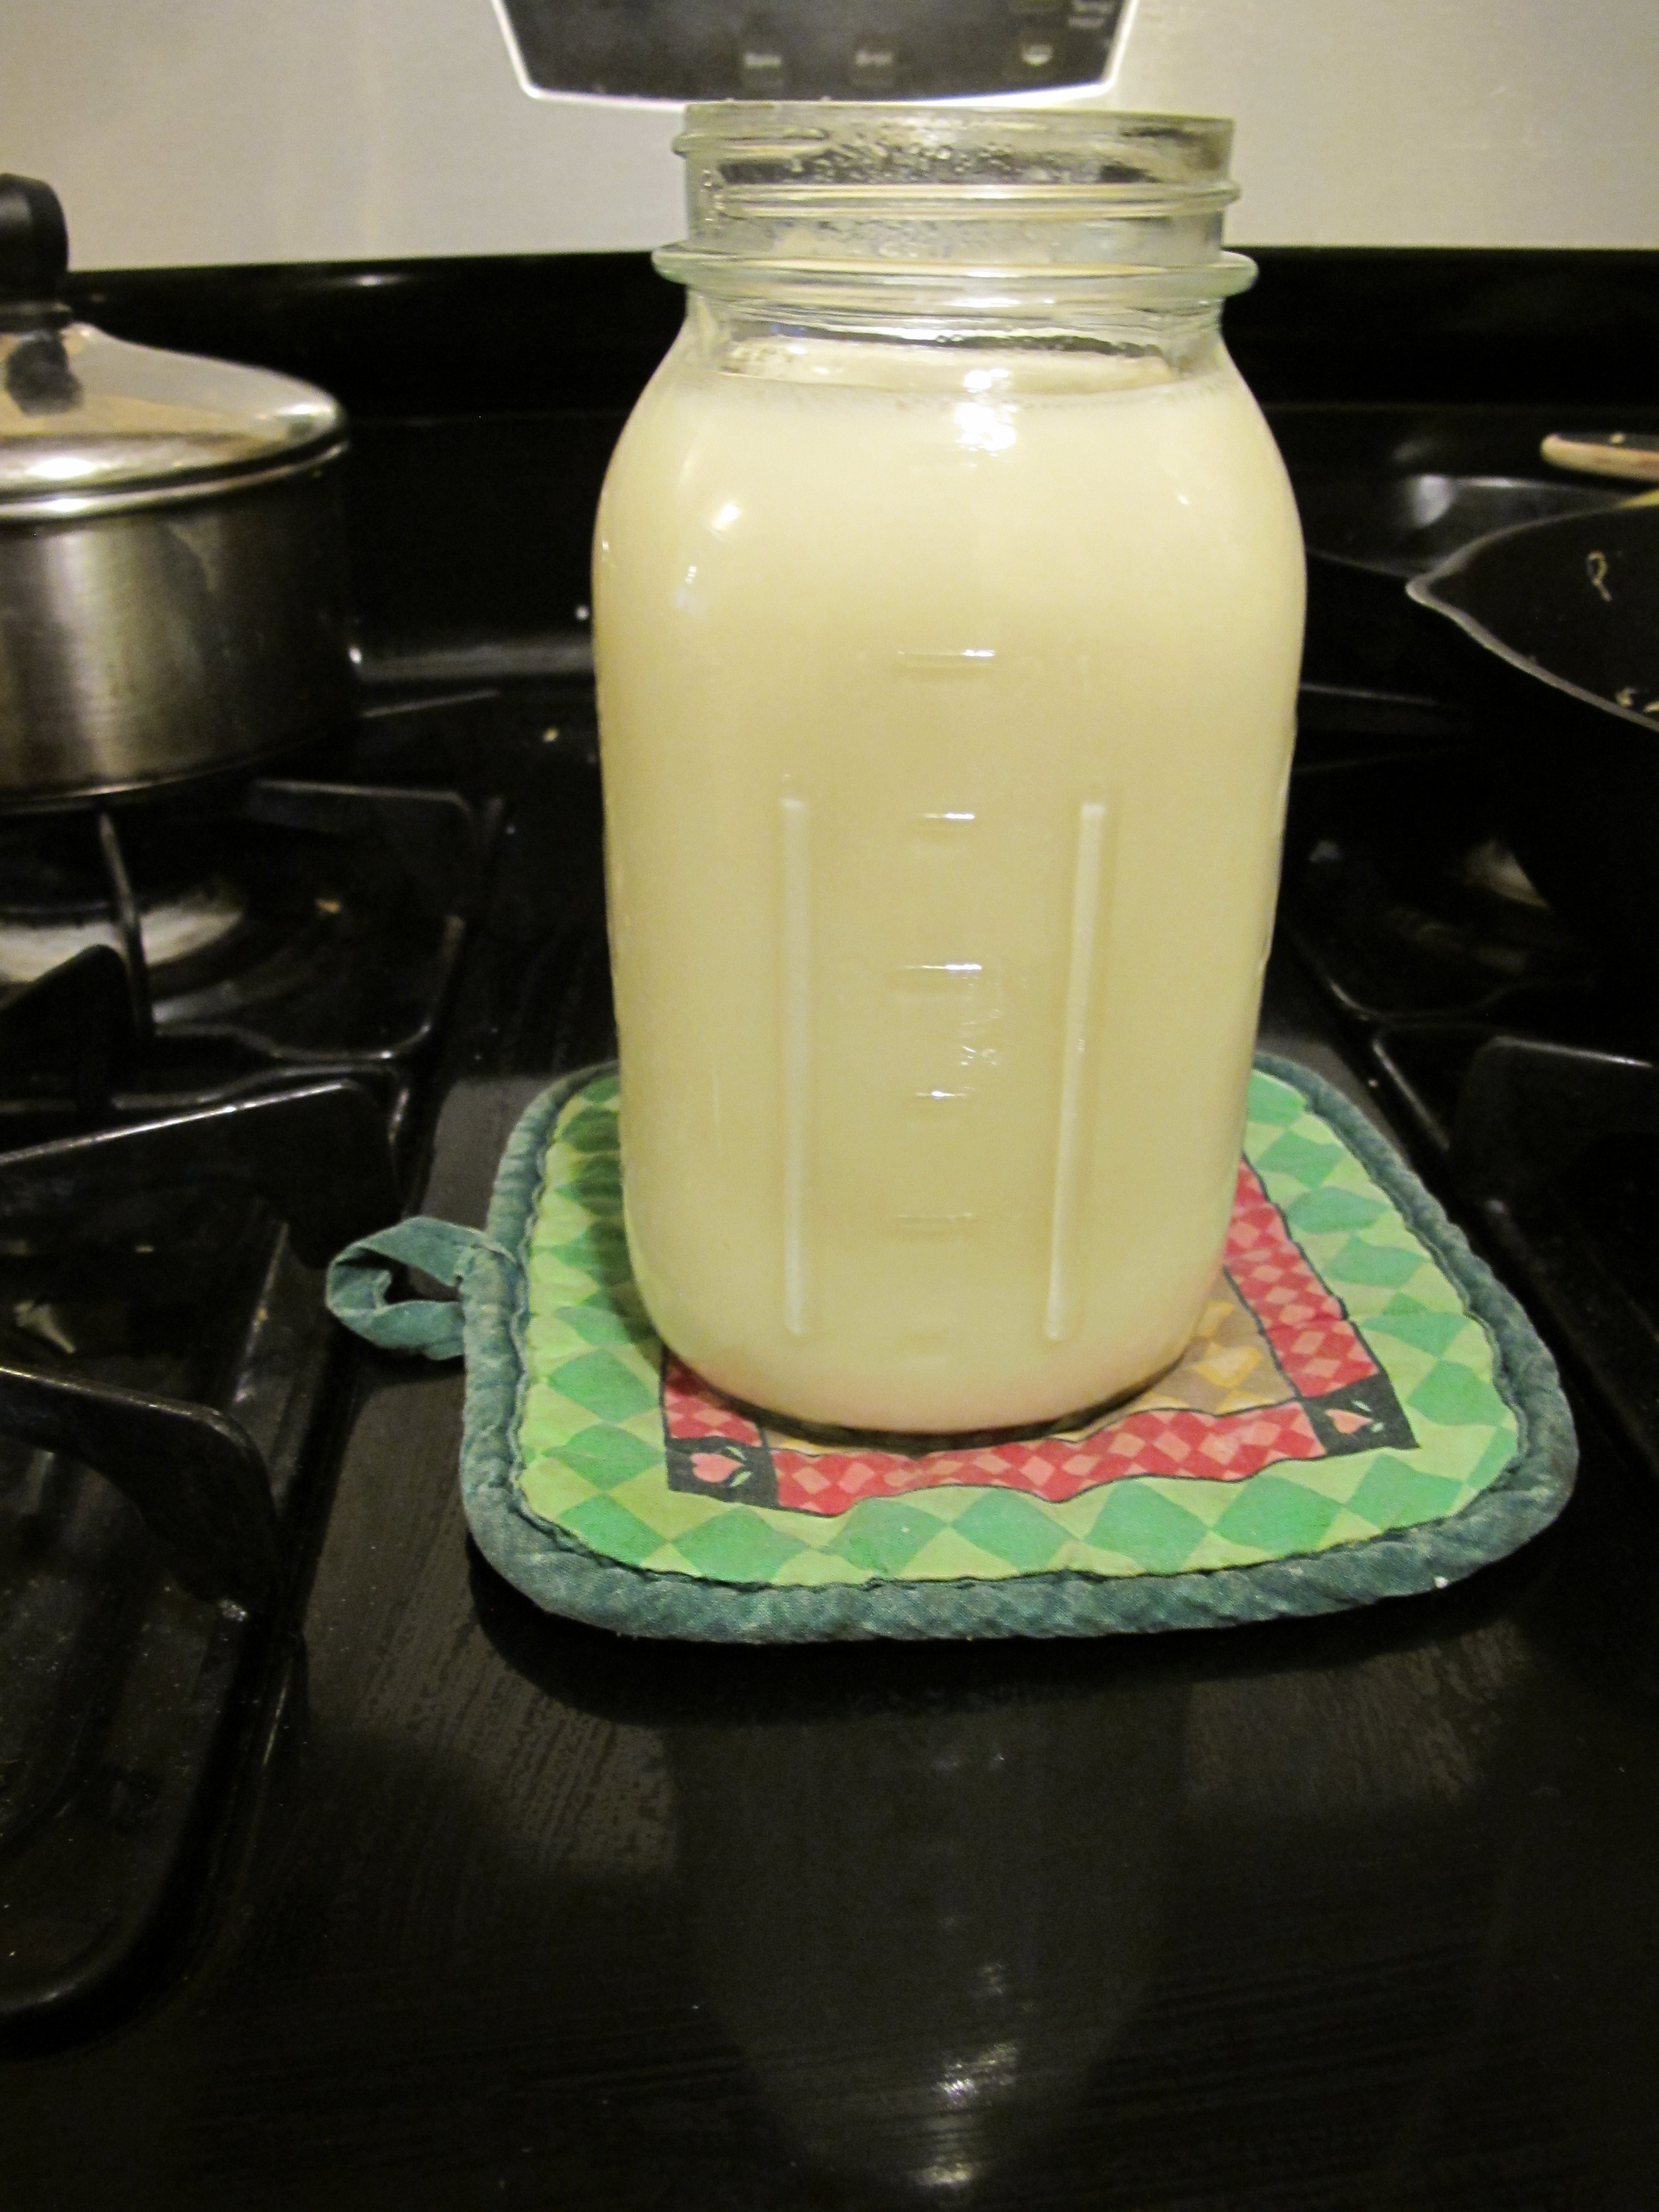
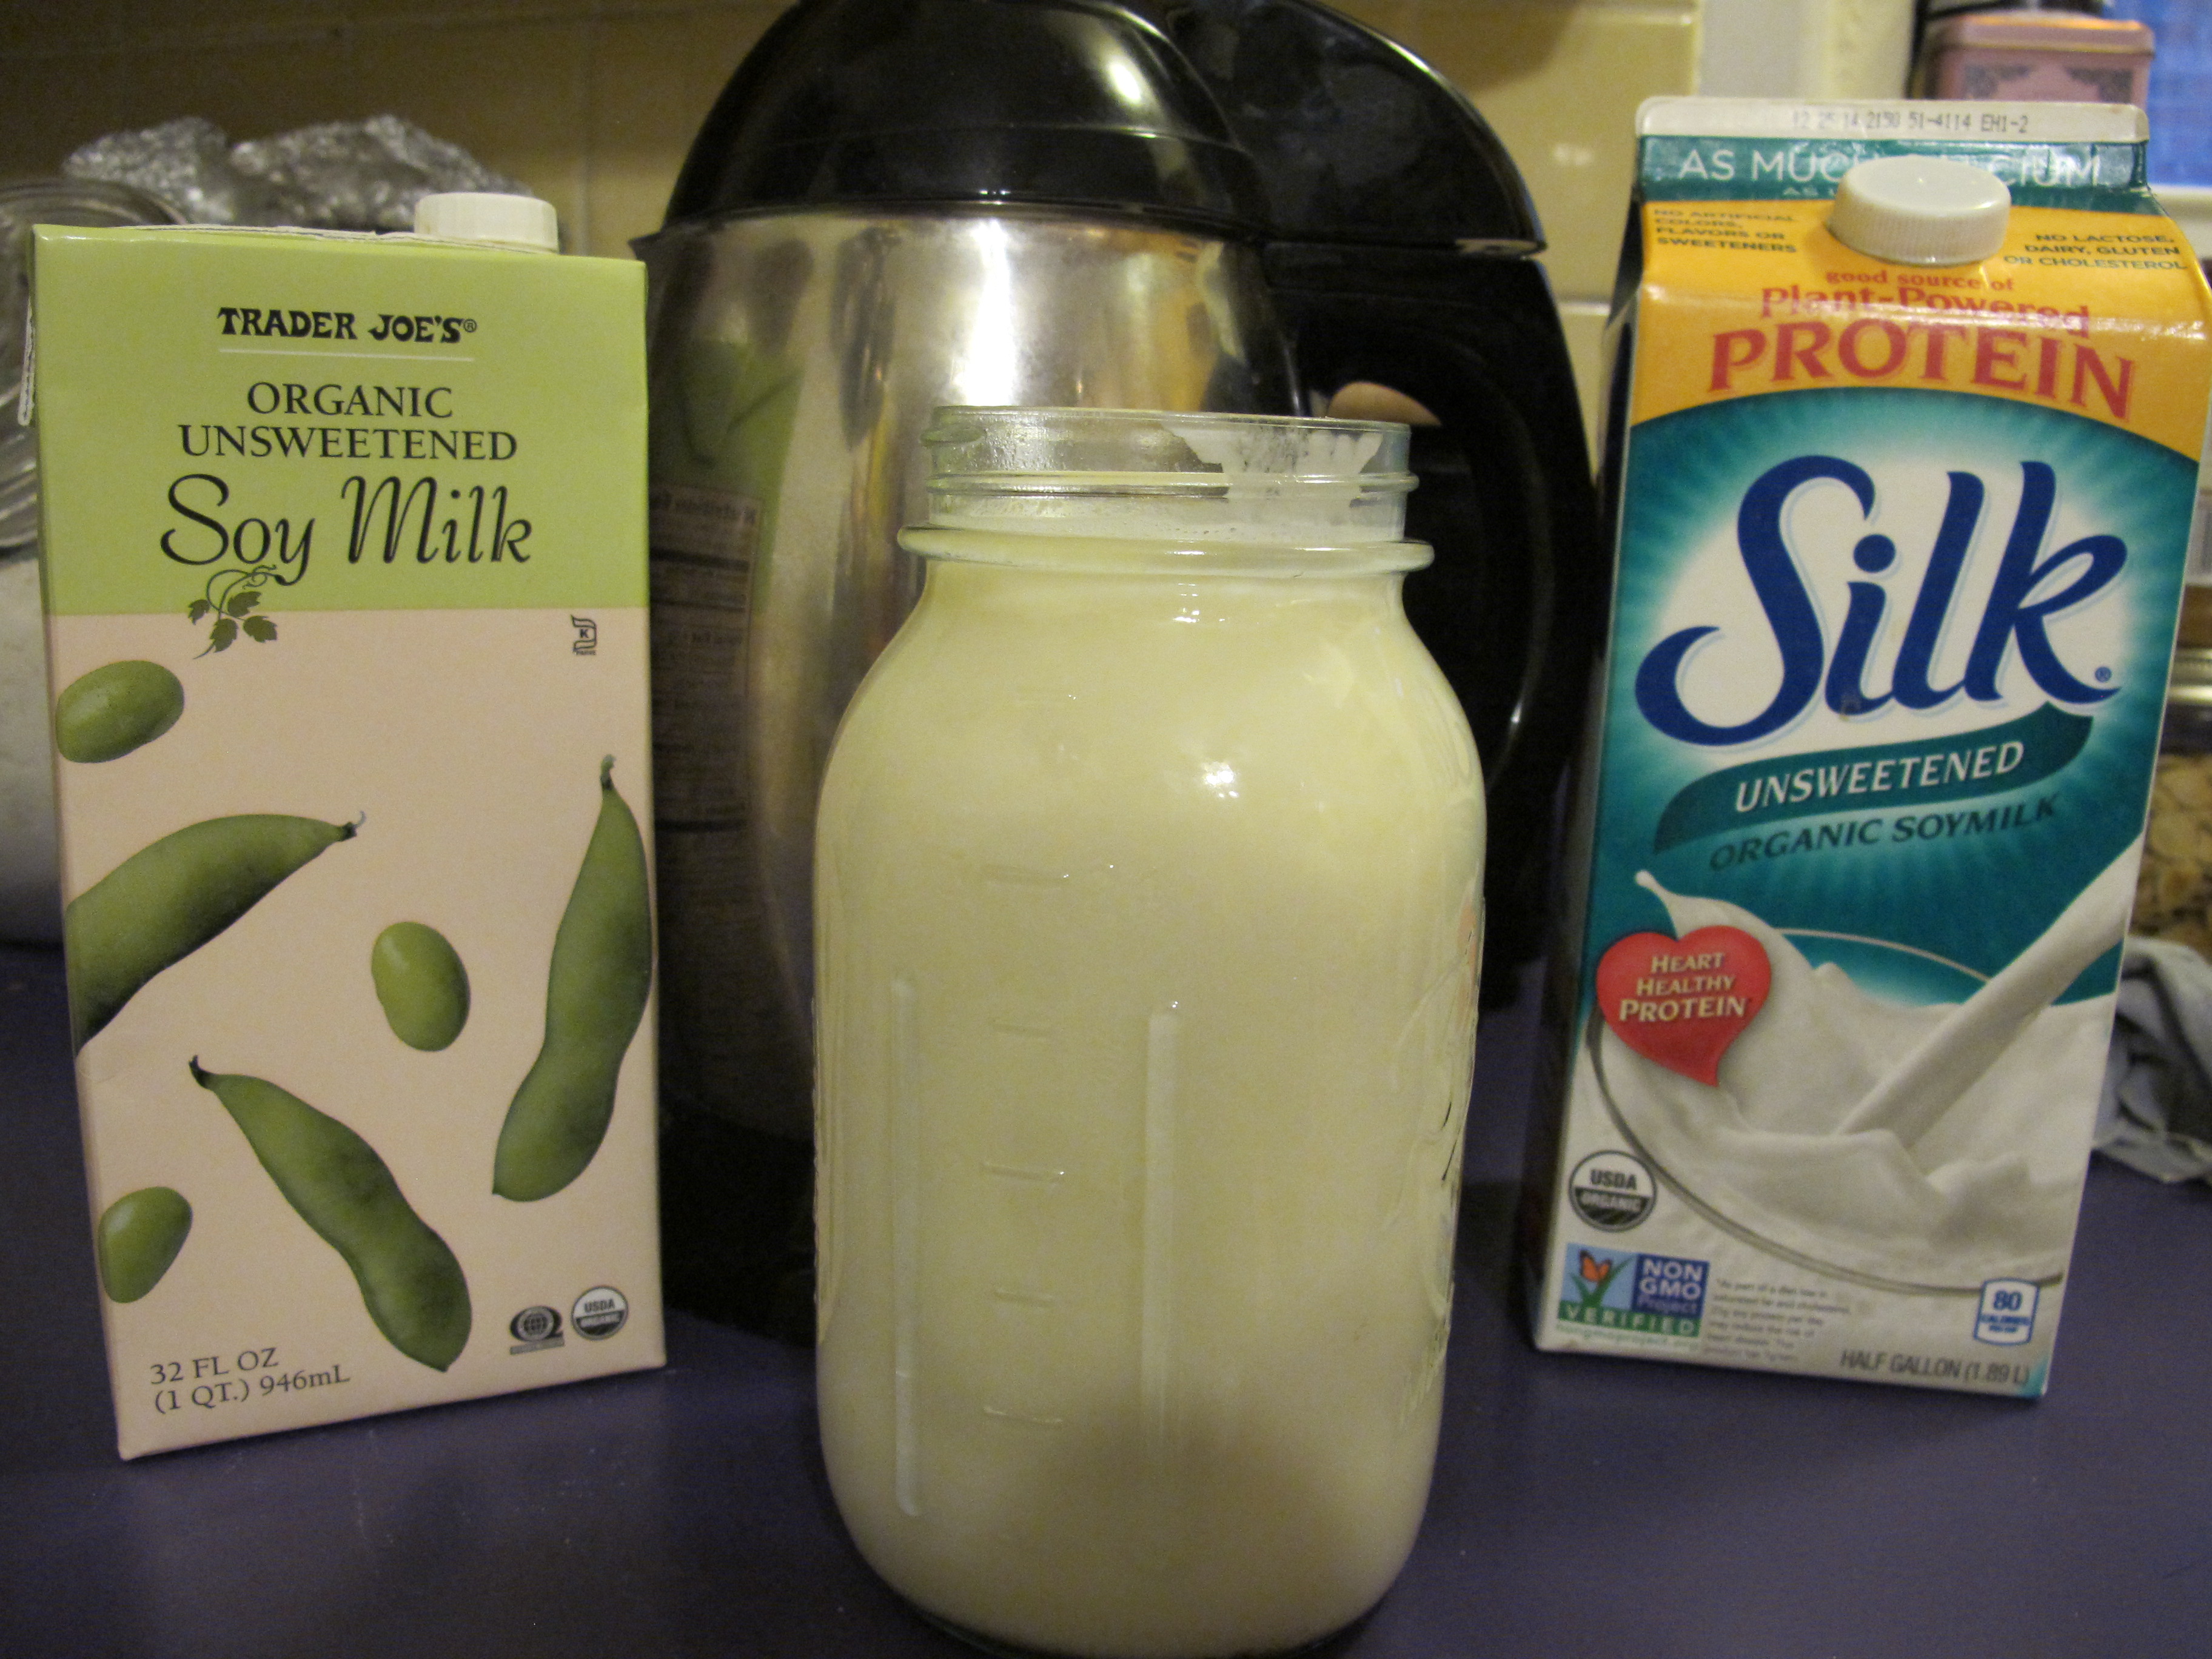
After that, you add the soaked, drained beans to the grinding chamber, add the appropriate amount of water to the pitcher (I used filtered), push the “Milk” button, and voilá, about twenty minutes later, you have soy milk.

As suggested, I added a pinch of sea salt.  I also reluctantly added a bit of sugar (I switched to buying unsweetened soy milk about three years ago, and I don’t miss the sugar (7g per cup in my usual brand/variety) at all).  However, there’s a very good chance that there’s something sweet-tasting (stevia?) buried in that “natural flavor” portion of the ingredient list.  For my homemade version, I started with about 1 T. of sugar in 1 quart of soy milk, which comes out to < 3g sugar per cup of milk.

IMG_6051

Initial results
The initial results were rather, “eh.”  It tasted very beany.  Granted, it is made from beans, but somehow, the soy-bean-only store-bought versions (TJ’s and WestSoy), while not exactly delicious, lack the pronounced beany flavor in my homemade product.

Inspired by a friend’s very positive review of Califia Farms Coconut Almond Milk, I had purchased some coconut cream in hopes that it might lead to an equally delicious soy milk.  (I did not try the Califia product myself, but I glanced at it in the store, and was duped into believing that it consisted of three ingredients: water, almonds, and coconut cream.  I like to think I’m a pretty good label reader, but a glance at the product link above reveals this milk is not as “pure” as it claims (for shame!):

Contains Less Than 2% Of The Following: Sunflower Lecithin, Sea Salt, Potassium Citrate, Natural Flavors, Gellan Gum, Carrageenan, Vitamin/Mineral Blend (Calcium Carbonate, Vitamin A, Vitamin E, Vitamin D2, Vitamin B12, Vitamin B2), Monk Fruit Concentrate.

So, maybe the coconut cream is not really the secret to this tasting good.)

IMG_6048

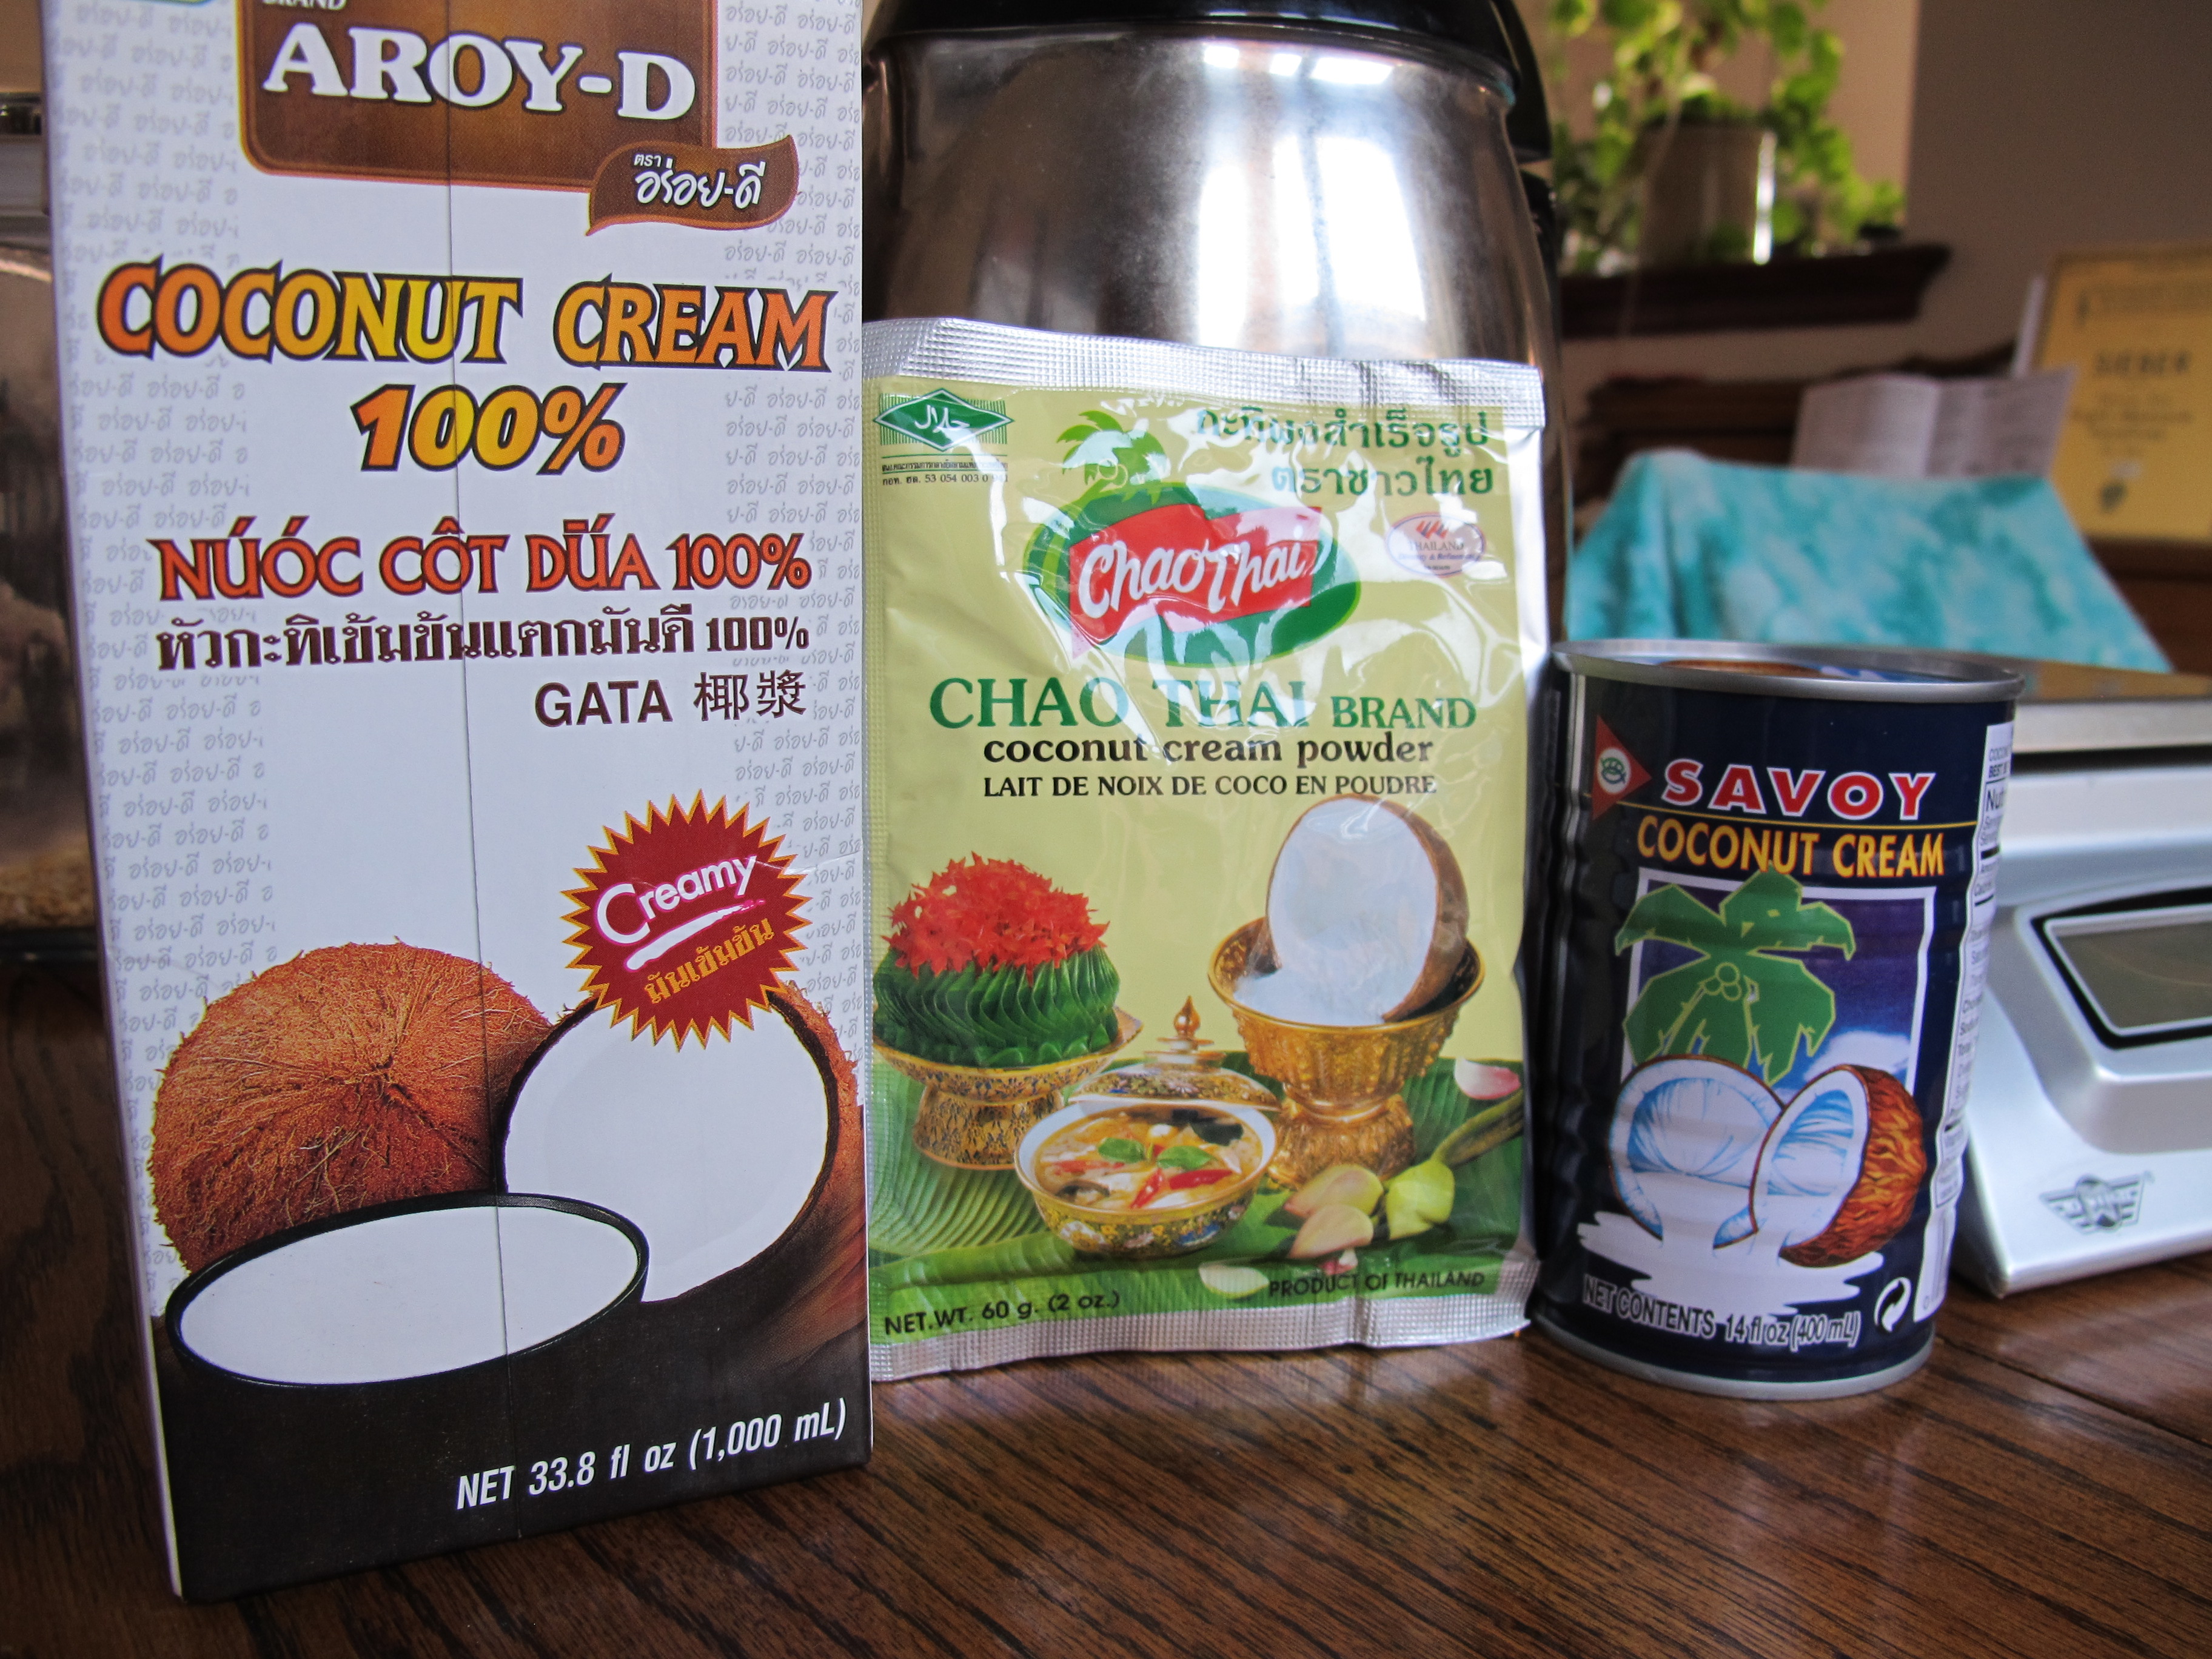
Anyhow, I bought two different brands of coconut cream, and a coconut cream powder.  In the end, these helped a bit, but they were no miracle fix for the beany milk.  This batch was okay for making oatmeal and using for pancakes and waffles, but not inspiring otherwise.  It was usable on cold cereal, but didn’t pass the sipping test.

Other varieties
Not yet dissuaded in my quest for tasty, homemade soy milk, I started playing around.  My second batch of milk in the Soyabella was actually the walnut and almond milk, which is soy free.  The taste was decent (no beans = no beany taste), but it quickly separated into a particulate-heavy bottom and a watery top.

I did some research into eliminating the beany taste in homemade soy milk, and settled on the following fixes:

  • removing the hulls from the soybeans
  • adding a few peanuts to the blend
  • additional cook time for the finished milk

I first tried a batch just removing the hulls.  It tasted better, but I wasn’t satisfied.  The next round, I cut back the amount of soy beans and added a few [soaked] peanuts.  Once the soy milk maker did it’s thing, I dumped the milk into a pan and simmered on very low for about twenty minutes.

The result was WEIRD.  It might have tasted okay, if I was able to get past the texture, but, no.  I’m guessing the stove top cooking, in addition to the cooking that happens in the maker, overcooked it, because the result was ridiculously thick and gloppy.  Adding more water after the fact didn’t help.  I got through this quart by using it primarily for oatmeal.  It was not good for cold cereal or sipping, and I didn’t want to waste good chocolate by using it for hot chocolate.  (In the interest of full disclosure, my other variable here was that I didn’t use only soy beans — I mixed things up a bit by using some black beans, but I really don’t think that was the problem.)

Another method
Some of my research into reducing the beany taste led me to recipes that don’t require a soy milk maker (here and here).  These recipes, which had seemed so daunting before, didn’t look so bad now.  The basic process was the same, minus the convenience of a single machine: soak the beans, grind with hot water (in a blender), filter (using a nut milk bag), and cook (on the stove top).

In the Soyabella, the milk “cooks” while still in contact with the filtered soy bean remains (known as okara).  I was curious if this arrangement (which you can’t avoid if you’re using the machine) intensified the beany flavor.  Armed with a blender and a nut milk bag for straining, I was ready to ditch the machine.

Ingredients

70 g beans (I used mostly soy beans, but I substituted a few chick peas), soaked and hulled
20-30g cashews (raw, unsalted), soaked
1 L boiling water

I pureed the [soaked] beans, nuts, and boiling water in two batches in the blender; filtered it through the nut milk bag; and simmered it on low, stirring frequently, for about twenty minutes.  I added a pinch of salt and 1 T. of sugar, and, hold on to your hats . . . .

. . . . it tasted good!  I actually enjoyed sipping this milk, and it passed the cold cereal test, wonder of wonders!

Back to the machine
To test things a bit further, I returned to the soy milk maker and used the same bean-cashew blend as above.  The result was okay, but, for better or worse, definitely not as good as the non-machine version.

On the one hand, I don’t have to run out and drop $100+ on a soy milk maker.  On the other hand, while making soy milk without a dedicated machine is not as daunting as I’d feared, the machine version requires less hands-on time than the blend, filter, heat and stir on stove top method.  Adding that time up every week could make the not-quite-as-tasty machine version an okay compromise.

Check back for one more post on final thoughts including ease of clean-up, using the okara, cost comparison, and health effects of going “carrageenan-free.”


Making soy milk — Part 1

Looking back, we’ve been talking about making our own soy milk for over two years now, when a friend first offered to let us try her soy milk maker.  For one reason or another, it took me quite awhile to actually take her up on the offer.  (You can make soy milk without a special machine, but, to a newbie, those recipes seemed complicated and labor intensive.  I bought soy beans, intending to try, but it never happened.)

Why make your own

  • Save money???
  • Reduce packaging waste (soy milk packaging is recyclable, but reducing >> recycling!)
  • Avoid additives in store-bought soy milk, particularly carrageenan
  • Better taste than carrageenan-free, store-bought options???

I could write an entire post on that last bullet point, but we’ll try the brief version.  Carrageenan is a “natural” additive,  derived from a type of seaweed, used in food as a thickener and/or emulsifier to improve flavor and mouth feel.  It’s found in many processed foods, not just soy milk.

WebMD says carrageenan is, “safe for most people in food amounts,” but the Center for Science in the Public Interest (CSPI) gives carrageenan a “Caution” rating, stating “May pose a risk and needs to be better tested. Try to avoid.”  (For a full report on carrageenan and human health, with links to peer-reviewed research, see this publication from the Cornucopia Institute.)  There is evidence that it may be especially prudent for individuals with Inflammatory Bowel Syndrome or other GI disorders to avoid consuming carrageenan.

I am not affected by any GI disorders, but the CSPI’s “Caution” rating was enough to make me want to investigate alternatives, and store-bought soy milk is the main source of carrageenan in my diet.

Soy milk consumption
When it comes down to it, I don’t consume all that much soy milk.  I’m not drinking three 8-ounce glasses per day.  In fact, I rarely drink soy milk at all.  I consume 1/3 to 1/2 cup a day in my oatmeal.  Some days, that’s it.  Other days, I have a bit more, either in hot chocolate, with cold cereal, or, very rarely as something I sip with a cookie.  A bit more slips into my diet some days via our homemade pancakes and waffles, but I think it’s safe to say that I average less than one cup of soy milk a day, total.

My other concern, of course, is Gabriel.  I would estimate his soy milk consumption at about 1/2 cup most days.  While he likely consumes a bit less than me, his body is smaller than mine, and perhaps more vulnerable to questionable ingredients.  As far as I know, Gabriel does not suffer from any GI disorders — he doesn’t complain of stomach pain, and his bowel movements are regular.

Store-bought options
A few years ago, I decided it was important to eat organic soy as much as possible.  This decision was not necessarily for health reasons, but rather to avoid GMO soybeans (avoiding the GMOs is also not necessarily for health reasons; for me, it’s about avoiding big agribusiness that threatens small-scale, local growers and food systems).

Based on availability and price, my go-to, store-bought soy milk is Silk Organic Unsweetened, which is readily available at most grocery stores, sold refrigerated in a half-gallon carton.  Sometimes I’d mix things up and buy the equivalent store-brand product at Whole Foods or Trader Joe’s.  The ingredient lists on these products were pretty similar: water, organic soybeans, carrageenan, sea salt, and “natural flavor.”

For carrageenan-free options, I tried Trader Joe’s Unsweetened Organic and WestSoy organic unsweetened.  Both of these come in aseptic quart cartons and do not require refrigeration until after opening.  Ingredients are simply water and organic soybeans.

To me, the carrageenan-free options were missing something in the taste department.  They were fine for my oatmeal and for cooking (e.g., making pancakes), and okay for hot chocolate, but not particularly appealing on cold cereal or for sipping.

Making my own
Part of my motivation for making my own was to see if I could make something that tasted good, without carrageenan and other “natural flavor” additives.

The other motivation was the waste factor: the store-bought options without carrageenan only come in quarts (vs. the half-gallons size of Silk and similar products).  Smaller quantities mean a higher packaging to product ratio, so by switching to the [quart-sized] carrageenan-free option, I was going to be generating proportionally more trash.  Uck.

IMG_6053
L to R: Trader Joe’s (sans carrageenan), homemade (with soy milk maker in background), and my beloved, tasty (but maybe not good for me?) Silk

Plus, what exactly is in the lining of those aseptic containers?  Nothing beats a good, old-fashioned glass jar!

When I started questioning carrageenan, my friend again offered to let me borrow her soy milk maker.  The timing was particularly good, because her family had taken a break from using it.  It’s been great getting to try the machine, and the resulting product, before committing to buying an appliance just for making soy milk.

I’ve been experimenting with it for three weeks now.  I’ve tried straight-up soy milk, plus a number of variations: adding coconut cream, a peanut soy blend, a cashew soy blend, and even a version that used some black beans.  Tomorrow, I’ll report back on the results!

Creamy celeriac soup

Nothing says fall is here like beautiful (or slightly funky, in the case of celeriac) root vegetables and chilly weather that invites turning on the oven to roast said veggies.

This recipe started with a desire to make a creamy soup based on celeriac (AKA celery root). Celeriac is a rather humble vegetable.

IMG_5917[1]

Beneath the dirt and gnarly exterior is some good stuff.  (We sell a lot of our celeriac to Five Bistro; it’s on the menu now, in fact!)

You can always chop up veggies, boil, and puree them, but basing the soup on roasted veg really amps up the flavor.  I discovered that starting with a covered dish for the first twenty minutes of roasting, followed by spreading the vegetables in a single layer on a baking sheet and roasting for an additional 30-40 minutes, worked really well for both celeriac and carrots.

I used a fairly generous amount of oil for roasting and generous butter for sauteing the leeks.  This approach yielded a rich, creamy soup without actually requiring cream.

CREAMY CELERIAC SOUP
Recipe by Melissa
Serves 4-6

Ingredients

2-3 celeriac, depending on size
8 carrots (you won’t use all of these in the soup, but you won’t regret having extra roasted carrots, trust me!)
1 large leek
4-5 small potatoes (or equivalent larger)
1 bay leaf
butter and/or olive oil
salt & pepper

Directions
Preheat the oven to 425° F.  Prep the celeriac by cutting off the tough outer layer, then cutting into large chunks.  In a large, lidded Pyrex baking dish, toss the celeriac chunks with olive oil and salt.  Bake in covered dish (use a baking sheet set on top of the pan or aluminum foil if you don’t have a lidded dish) for about 20 minutes.

Prep the carrots by cutting into carrot sticks.  Wash and chop the leeks.

Once the celeriac has roasted in the covered baking dish for 20 minutes, use a slotted spoon to transfer to an oiled baking sheet (minus any accumulated liquid in the pan).  Roast on the baking sheet, uncovered, for 30-40 more minutes, stirring once.

In the same baking dish you used for the celeriac, toss the carrots with some olive oil, cover, and roast for 20 minutes.  After 20 minutes, follow same procedure for transferring to a baking sheet and roasting, uncovered, for an additional 30 minutes.

Chop the potatoes (large chunks), and cook with a bay leaf and 5-6 cups of water, and 1 t. salt.

Saute the leeks in butter, over low heat.

Once your celeriac and carrots are roasted, potatoes are boiled, and leeks are sauteed, you’re ready to blend.  For this soup, I pureed all of the potatoes, most of the celeriac (reserved some to chop smaller and add to the soup as chunks), most of the leeks (again, reserved some to garnish the soup), and about 1/4 of the total carrots I roasted.  Use the cooking water from the potatoes as your broth (just remember to remove the bay leaf before pureeing!).

Working in batches, blend until you have a nice, smooth, creamy soup.  Add more or less of the broth (or additional water) to reach a consistency of your liking.  Salt and pepper to taste, and add the reserved leeks and celeriac chunks.

We rounded out the meal with a side of greens and [whole wheat] bread spread with roasted garlic.  Oh, and some of the extra roasted carrots!

Stuffed peppers

One for my foodie readers (I know it’s been a lot of bike stuff lately, but that’s life!).  Anyhow, I was beginning to despair of ever having peppers, and then, voila!  Grocery bags full of gorgeous sweet peppers!

We also had a few large green bell peppers, which Matthew suggested stuffing.  I made these based on [a vegetarian adaptation of] his grandmother’s recipe.*

In the interest of not reinventing the wheel, the recipe here is adapted from the stuffed zucchini recipe I shared earlier this summer.  To make this recipe similar to Matthew’s grandmother’s recipe, simply use tomatoes for most of the veggies to make a nice amount of tomato sauce.  Thicken the sauce with a couple tablespoons of flour, which you mix in with the sauteing onions and other veg before adding the tomatoes. IMG_5805

Stuffed Peppers

Recipe by Melissa
Serves 4-6

INGREDIENTS

4-6 large bell peppers, any color
1 onion
6 cloves garlic
1.5 c. uncooked grain (brown rice, quinoa, millet, farro)
1 c. cooked lentils or 1 8oz package of tempeh
4-8 c. vegetables of choice (tomatoes, peppers, eggplant, kale or spinach, fennel)
fresh or dried herbs (thyme, oregano, parsley)
4-6 oz. cheese, cut into small cubes (I used Havarti and Gruyere)
olive oil and/or butter
salt and pepper

Directions

1. Prep the peppers: cut off the tops, and scoop out the seeds.  Bring a large pot of water to a boil.  Parboil the squash for 1-2 minutes (it doesn’t take long with these guys), until slightly tender.  Drain well.

2. Prep the grain.  To up the flavor, add a bit of salt, plus some onion powder and a pinch of tumeric to this step.  If you want to conserve water and energy, use some of the already-heated water from step 1 to cook the grain.

3. Prep the veggies: You want everything fairly tender and ready to eat.  Chop everything into bite-sized pieces.  Sauté onions, then add other veggies to sauté.  I used a mix of butter and olive oil, plus about 1/2 t. of salt.  If you’re using tomatoes, you can just throw the chopped, uncooked tomatoes into the filling, or cook them down into more of a sauce.

4. Prep the tempeh, if using: I basically followed the method I use to prep tempeh for vegetarian reubens, except I crumbled it up first, instead of leaving it in a slab.

5. Combine it all: In one large pan or bowl (one of the ones that’s already dirty is fine, if it’s big enough), combine everything from steps 1-4.  Toss in any herbs.  Taste for overall salt and flavor level, and adjust as needed.

6. Stuff it and bake it: Preheat [toaster oven] to 400F.  Arrange peppers, open side up, in a baking pan (for four peppers, a bread pan worked well, and allowed me to use the toaster oven).  Sprinkle halves with salt.  Add the stuffing.  Bake for 15-20 minutes — long enough for cheese to get melty and flavors to meld a bit.

*The original recipe uses ground beef in place of the cheese and tempeh.  My MIL’s veg adaptation uses all cheese.  This version lightens it up a bit by replacing some of the cheese with lentils or tempeh.  Matthew said it was good, but he still wants the cheesy version sometime.

Pacific time — What we did in Portland

It took a good 5-6 days of being stuck between Central time and Pacific time (so, Mountain time, technically), but we’re more or less back to our regular routine around here.  Now it’s time to review our trip before I forget anything important.

Lodging
We stayed in four different houses/apartments over the course of eleven days in Oregon.  We started in a VRBO house just southwest of Mt. Tabor in Portland.  After three nights, we moved to a VRBO apartment in the Buckman neighborhood of Portland.  We loved this location — very central for biking, plus some things within walking distance — and we were here for five nights.

At that point, we headed out of Portland for a couple of days.  Our road trip took us to a VRBO cabin in Prospect, Oregon, just south of Crater Lake.  That was our home for two nights as we explored both Crater Lake and the abundance of amazing waterfalls in the area, many of which are quite easily accessible (i.e., short walks/hikes that were relatively easy for Gabriel and my MIL).

We stayed in Portland at my SIL’s apartment for the final night of our trip.

Transportation
While in Portland, we mostly got around by bike, other than the trip from and to the airport.  We shared a rental car with Matthew’s mom.  My MIL shouldered most of the work of shuttling other people around in the car, and we enjoyed most of our time in Portland car-free.*

Over the course of six days (not counting the bike-free day when we drove to Silver Falls), we put in 60 bicycle miles in Portland.  Our highest mileage day was 14 miles, and our lowest was 9 miles.  If anything, I expected those numbers to be higher.  It felt like we were all around the town.  I guess the lower than expected mileage is a testament to Portland’s density?

BikePortlandMap

We covered a lot of southeast Portland, some of northeast, and a bit of northwest.

For us, the rental car was essential for our day hike at Silver Falls State Park and the side trip to Crater Lake, and it was nice for getting to/from the airport (but we could have taken a cab), and otherwise a huge PITA (long wait for pick-up at the airport, then arguing that we had reserved/needed a 4-door vehicle vs. the 2-door they were trying to stick us with, then having to swap cars after two days due to brake and electrical issues).

Food
While we were in Portland, we were on the “bakery-a-day” plan (good thing we were doing all that biking!).  The bulk of our pastries came from Ken’s Artisan Bakery and St. Honoré Boulangerie.  At Ken’s, we love the Oregon croissant (though we weren’t quite as impressed this trip, compared to last time), the vegetable quiche, and the cannele.  At St. Honoré, we love the mirliton (a small tart, filled with almond batter and fruit — two years ago we had pear; this trip, they had cherry, which was amazing!) and the cannele; we also had a nice chocolate croissant here.

We tried one new bakery this trip, Crema.  Matthew liked their fruit danishes, though I wasn’t amazed (not enough cream cheesy filling and too much of a sweet glaze — I like my pastries barely sweet).  I enjoyed a piece of their chocolate espresso bread (heavy on the chocolate, light on the espresso).

Outside of bakeries, my favorite food came from Pad Thai Kitchen (on SE Belmont), Boke Bowl, and ¿Por Que No? Taqueria.  We ate at another Thai place and a French place that were okay, but not remarkable.  It is quite possible that we spent as much money at bakeries over the course of the trip as we did on food at restaurants.

Vegetarian rice bowl at Boke -- the tofu in here was amazing!
Vegetarian rice bowl at Boke — the tofu in here was amazing!

The other food highlight that I should mention is the delicious paella served at my SIL’s wedding, from none other than a catering place that makes only paella.  They knocked the vegetarian version out of the park with delicious white beans, mushrooms, artichokes, and other veggies.

Because we had full kitchens at all of our places, we also did a decent bit of eating in, which helped budget-wise, and nutrition-wise, too (ensuring we ate at least some beans and had some grain variety).  This option was also very nice in Prospect, where dining options were limited (grocery options were also quite limited in the area around Crater Lake, so plan accordingly).

Things to do
So, what did we do other than riding our bikes from bakery to bakery?  Mostly lots of low-key stuff.

We visited a couple of playgrounds with Gabriel — easy, free, and fun way to pass time with a little one.

IMG_5287
Playground at Dawson Park in N/NE Portland

Other than renting the Bullitt, our only paid entertainment was a visit to the Oregon Museum of Science and Industry (OMSI), which felt like a blend of the Science Museum and the Magic House in St. Louis (paid admission, unlike our Science Center).  You could probably spend an entire day at OMSI, but our visit was limited to just a couple of hours, which, after torturing Gabriel by walking through the [to him terrifying] dinosaur exhibit, were mostly spent in the Science Playground, a wing just for the 6-and-under crowd.

IMG_5150

The Science Playground had a sandbox!  With construction equipment!  Sir was in heaven.

We did a bit of shopping in the stores around the 3500 block of SE Hawthorne, as well as a quick visit to Powell’s books in downtown Portland.  (I was disappointed to discover Powell’s was not just used books, but rather a mix of new and used.  They also don’t have a “used” section; rather, the used books are mixed in with the new, and, at least for children’s books, their offerings seemed to skew heavily toward new.)

Most of our remaining time was spent with family and new friends, celebrating my SIL’s wedding (for which Gabriel was a ring bearer).

That’s all for now, though I have at least two more trip-related posts, one on Crater Lake and one on bike infrastructure in Portland (I made myself take pictures this time around!).

 *Between the rental car and the borrowed bikes, we didn’t end up using public transit, but a friend told me that Portland has a great app that makes it very easy for a visitor to use the system to get around (assuming you have a smart phone).