Black-eyed pea potato salad for a picnic

Last summer we made is to less then one Wednesday night Whitaker Music Festival (I didn’t say “zero” because we picnicked with G and some friends one night, but left before music started in order to get someone home to bed).*  We’re set to remedy that abysmal count this summer, with standing Wednesday night childcare (by which I mean grandma).

Whitaker nights mean picnics and picnic food.  Last week I whipped up a pasta salad full of veggies, including scapes, kale, and fennel from the garden, plus sides of pickled beets and artichokes.

20150603_181509[1]

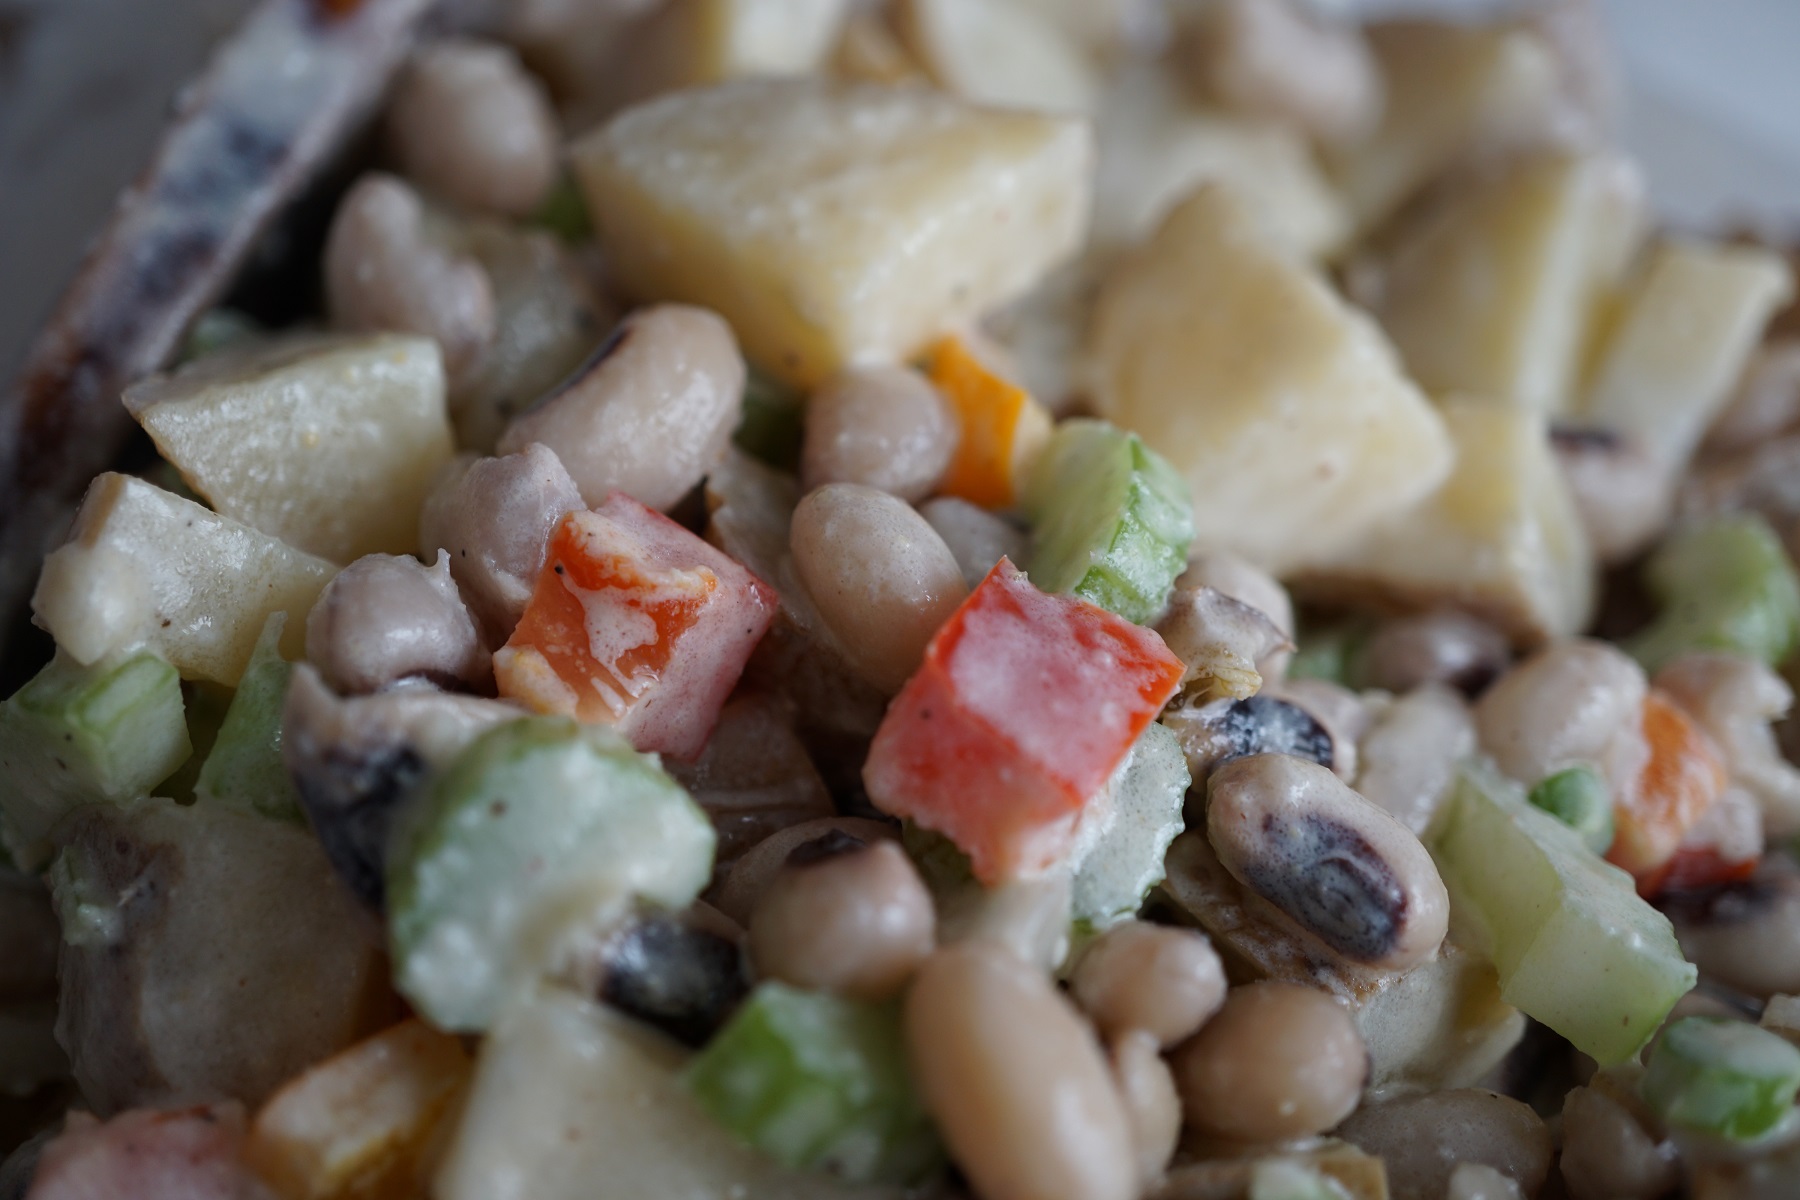
On Sunday, I cooked the very last of our garden potatoes.  We ate some for lunch, and I turned the rest into this potato salad.  While I usually cook in large batches, the remaining potatoes dictated the size of this recipe.  You could, of course, scale it up.

BLACK-EYED PEA POTATO SALAD

Recipe by Melissa
Serves 2-3

Ingredients
5-6 egg-sized potatoes
2 T finely diced onion
2 T finely diced garlic scapes (or 1-2 t minced garlic)
1/3 c. chopped bell pepper (I used frozen)
1/8 c. finely diced celery
2/3 c. cooked, drained black-eyed peas
1-2 T olive oil
1 T mayonnaise
1 t dijon mustard
2 T plain yogurt
1 t white wine vinegar
S&P to taste
Fresh herbs**

DSC01455_SMALL

Directions

Clean the potatoes.  Then place whole, skin-on potatoes in salted water.  Bring to a boil, and boil for 10-12 minutes until tender, but not over-cooked.  Cool, then cut into bite-sized pieces.

Prep your veggies.  Toss potatoes, beans, veggies and all of the other ingredients in a bowl to mix.  Keep chilled until ready to serve.

**Fresh dill would be great here, but our fresh dill is at the garden, which is miles away.  So.

DSC01457_small

I’m rounding out tonight’s meal with some leftover kale-quinoa quiche (which is great at room temp).  Artichokes will also make another appearance — they’re somewhat time-consuming to eat, which makes them not-so-great for meals with little ones, but perfect for relaxed, open-air dining.

Here’s a quick peek at our standard picnic gear.

DSC01462_small

Clockwise from top left: Mason jar wine glass, water bottle, s&p, cloth napkins, cloth utensil holder, and our fancy “plates.”  Not pictured — an insulated bag to keep everything cool in the 90-degree heat!

Our go-to picnic plates consist of the top and bottom of a large take-out container.  This option is perfect for picnics (or potlucks) — one person uses the container and the other uses the lid.  This system requires no on-site clean-up; when the meal is over, just put the lid on for no-mess transportation.  (I saw some people washing dishes in the restrooms last week, and, while I appreciated their attempts to avoid disposable options, the remaining bits of food and oils were clogging the sinks.)

Sadly, after years picnic and potluck use, our plastic container-plate is getting more than a little worn.  I’d like to find something similar, but made out of stainless steel, as a replacement.

I’ve been wanting to make a “chicken” salad (using chickpeas), and I’m having fun thinking of other picnic food ideas.  What’s your go-to food for a picnic?

**Check out the Garden’s “Hit a Green Note” challenge/pledge for sustainable picnicking 🙂

Monumental fennel

Look what our garden made!

A gigantic fennel bulb!  It’s always fun to try something new in the garden.*  We tried fennel last year, but never got beyond a tiny little plant.  Not so this year!

We roasted the bulb, and we’re using the stalks and feathery bits in salads.  Roasted fennel is quite the treat!  While we were at it, we roasted some garden beets and turnips, too 🙂

Roasted Fennel
Preheat oven to 400° F.  Cut fennel bulb into quarters.  (Reserve stalks and feathery bits for something else.)  Brush both sides of fennel with olive oil and sprinkle with salt.  Roast for about 40 minutes — flip to other side at the half-way point.  Finished product should be tender, golden, and caramelized.

*Growing Fennel (advice from Matthew)
We started the fennel from seed (look for “Florence fennel” or “bulbing fennel”) back in mid-January using our grow lights.  We transplanted them to the garden in mid-March, when they were still quite tiny.

What Worked for Us

  • When transplanting (or if sowing seed directly), leave at least 12 inches between plants to encourage large bulb formation.
  • Keep plants well-weeded early on — mulching will help with this.
  • Keep watered, too — again, mulch helps here.
  • Pray to the weather gods 😉 The rainy, cool spring probably helped.
  • Click here if you want more details.

Surviving a dairy-free diet — ice cream required

Going Dairy-Free
Fortunately, most of our baked good recipes can be easily modified.  Instead of cow’s milk, we substitute soy milk.  Almond milk can also work some places, but soy is more similar to dairy in terms of fat and protein.  For butter, we are using Earth Balance spread.  It’s not cheap, but neither is the organic butter we buy.  Fortunately, we’re going for dairy-free, not vegan, so we are free to use eggs.

To make sure Matthew would not be deprived for the trial period, we made up dairy-free versions of some of favorite baked goods, including a sweet biscuit (great topped with fresh fruit and ice cream), date-oatmeal cookies, and one of our go-to chocolate chip cookie recipes, along with some bread and English muffins.

Hold the Cheese
I’ve never really experimented with “vegan cheese,” and the opinions on taste seem to be mixed.  The ingredient lists of many tend to read like a foreign language, which is a red flag, so cheese-like-substances are off the menu.

Avoiding Hidden Dairy
Dairy hides in many products in the form of casein and whey.  It could also lurk in products with ingredients that include “flavoring” or “natural flavoring.”  Since our normal diet contains minimal processed foods, lurking dairy isn’t a big issue, but we did check a few items in our pantry, including the breakfast cereal.  For us, the main issue here is that it makes any meals we don’t prepare (i.e., restaurants or dinner at parents) tricky.

Ice Cream
Finally, we get to the important part 😉  About a year ago, we bought a new-to-us Donvier ice cream maker, and other than occasional Ted Drewes (St. Louis’ iconic frozen custard) and gelato, we mostly make our own ice cream.

We modified the basic vanilla ice cream recipe in the Donvier booklet with great success.

Dairy-free Vanilla Ice Cream
3 eggs
7 oz. unsweetened soy milk
7 oz. unsweetened almond milk
1 c. sugar
1 – 14 oz. can of coconut milk (use full fat, NOT low fat)
2 t. vanilla

Beat eggs with soy milk and almond milk in a saucepan.  Add the sugar.  Cook over medium heat.  Stir constantly, gradually adding the coconut milk as the mixture heats.  Cook for about 10 minutes, until mixture reaches 170° F.  It should start to thicken at this point.  Remove from heat.  Let cool, then add vanilla.  Chill completely before pouring into ice cream maker.  Follow manufacturers’ instructions.

This recipe makes about 1 quart of ice cream (which is what our ice cream maker holds).  You can easily double it and freeze it in two batches.

His

Note: For best texture/consistency, enjoy some immediately after freezing in the ice cream maker.  If the ice cream has been in the freezer, let your serving sit at room temperature for a few minutes, until it just starts getting melty, then stir well and enjoy!

Hers

Black-eyed peas

So, back on the first of the year, I wrote a post about a new soup I planned to make.  I said I would post the recipe here if it turned out well, and, nudged by the fact that I made it again last night, I’m finally getting around to it.   Black-eyed peas and kale form the base for this simple, delicious, and healthy soup.

Click here for the recipe for “Southern New Year’s Day Soup” from Vegetarian Times.  A few notes on my adaptations:

  • I used onions instead of leeks both times.  I’m sure leeks would be good, but they’re not something we keep around.
  • I used a liberal amount of garlic (shocker, I know!).
  • The recipe calls for dried black-eyed peas and never tells you to cook them.  If you start with dry peas, you need to soak and cook them just like you would any dried bean (although I think they cook faster than other types of dried beans).  Otherwise, if you can find them, you can start with canned black-eyed peas.
  • I used water and the cooking liquid from the peas, along with a bit of extra poultry seasoning, instead of the quart of vegetable broth.
  • The soup is good both with or without the pasta.  If you add pasta, cook it separately and add it to just the portion that you will be eating at that meal, otherwise it will get soggy.
  • As before, both the peas and the kale were locally grown 🙂