We’re all a bit under the weather here, which, given the dreary state of the weather, is saying quite a bit.
Seedlings getting their green on
In the “better late than never” category, here’s a look back at some past St. Pat’s Days, including some ideas for greening your meal and a link to our oh-so-good vegetarian reubens:
Last year, we spent this weekend planting potatoes. Matthew didn’t get around to that yesterday, but he has ten varieties he’s considering this year, so we might do a quick taste test tonight, since he’d like to narrow it down to six or less to plant next weekend.
In my recent post on lunches, I mentioned risotto, with the promise for a recipe soon. I had to look back through my archives to make sure I hadn’t already shared the recipe here.
Turns out, this was NOT the first time I mentioned my risotto method — the previous instance occurred over two years ago, in December 2010. At that time, I also said I would post the recipe, yet a search of my archives shows zero risotto recipes. Let’s call it pregnancy brain, shall we?
If you’ve been waiting over two years for my top-secret-easy-and-healthy risotto recipe, I do apologize. If you’ve only been waiting since last week, think how good you have it!
The secret to my risotto is using oat groats instead of the traditional arborio rice. Though they sound like something a horse (or a goat?) might eat, oat groats are simply the whole oat grain — what they steam and flatten to make rolled oats. It looks like a wheat berry.
So, why use oat groats? Well, nutritionally, you get the health benefits of whole grain oats, with a good serving of heart-healthy fiber. While this is not a fat-free, or even necessarily a low-fat recipe, the natural creaminess of the starch in oats produces an effect similar to arborio rice, and you can have a very rich tasting dish without having to add too much fat.
While oat groats take just as long, if not longer, to cook than arborio rice, they require less babying. Traditional risotto has you standing at the stove stirring the whole time, gradually adding small amounts of hot broth every now and then. With oat groats, after toasting the grain for a few minutes, you can toss in the broth, bring it to a simmer, cover it, and walk away. Sure, you’ll have to come back every now and then to give it a stir, but it’s not a big deal.
Butternut squash and asparagus risotto
Recipe by Melissa
Ingredients* 1 1/2 cups thinly sliced leeks (or sub. diced onions)
2 T. butter
2 T. olive oil
1 1/2 cups oat groats
5 c. vegetable broth
8-12 saffron threads
1-2 c. cooked butternut squash
2 c. asparagus pieces
1 c. frozen peas (optional)
salt (to taste — amount will depend heavily on how salty your broth is)
1/3 c. nutritional yeast
1/2 c. freshly grated Parmesean cheese
Directions Melt butter over low heat in large sauce pan. Add leeks, and cook gently until softened, 10-15 minutes. Add olive oil and 1/2 t. sea salt. Add oat groats, increase heat to medium, and cook for 5 minutes to lightly toast the grain.
Add 3c. broth and the saffron — broth can be hot or cold, but if you start from hot, it will speed things up a bit. Bring to a boil, then reduce heat to maintain a gentle simmer while covered (the oat groats will need to simmer for a total of 60-90 minutes).
After 20 minutes, add the butternut squash. You want it to dissolve into the risotto, adding to the depth and richness of the dish.
At this point, the risotto should be thickening nicely. You may need to stir it a bit more frequently now. Add the nutritional yeast, and more broth if necessary.
After 60 minutes of simmering, check tenderness of the grain, it should be chewy, but tender. If it’s close to ready, add the asparagus and peas. Maintain a gentle simmer for 10-15 more minutes. When vegetables are tender and cooked through, remove from heat and stir in the grated Parmesean cheese. Season to taste with salt and pepper.
*Ingredient variations are pretty much endless. The picture above is actually a sun-dried tomato and leek [oat groat] risotto, originally mentioned here.
Send in the vampires because the sad day has arrived, my friends. We are out of garlic.
Back in July, around the time he harvested many big, beautiful bulbs of garlic, Matthew also came across a guy selling his own locally grown garlic for a decent price at the farmers’ market. Knowing how much we love garlic — I start most dishes with the assumption of a nice-sized bulb — and knowing that he would be saving the best of our bulbs for planting this year’s crop, he bought thirty bulbs to supplement our harvest.
Over the last several months, we made the most of that garlic — garlic in almost every dish, roasted garlic here and there, and a nice batch of bagna couda later, our stockpile dwindled.
Unfortunately, the bought garlic was not nearly as high quality as what we grew — it did not store as well and had smaller cloves which are less fun (read: more work) in the kitchen. Whether it was garlic variety, growing conditions, and/or harvesting conditions, it just didn’t measure up. Still, I made the most of it, salvaging what I could toward the end and dealing with the small cloves.
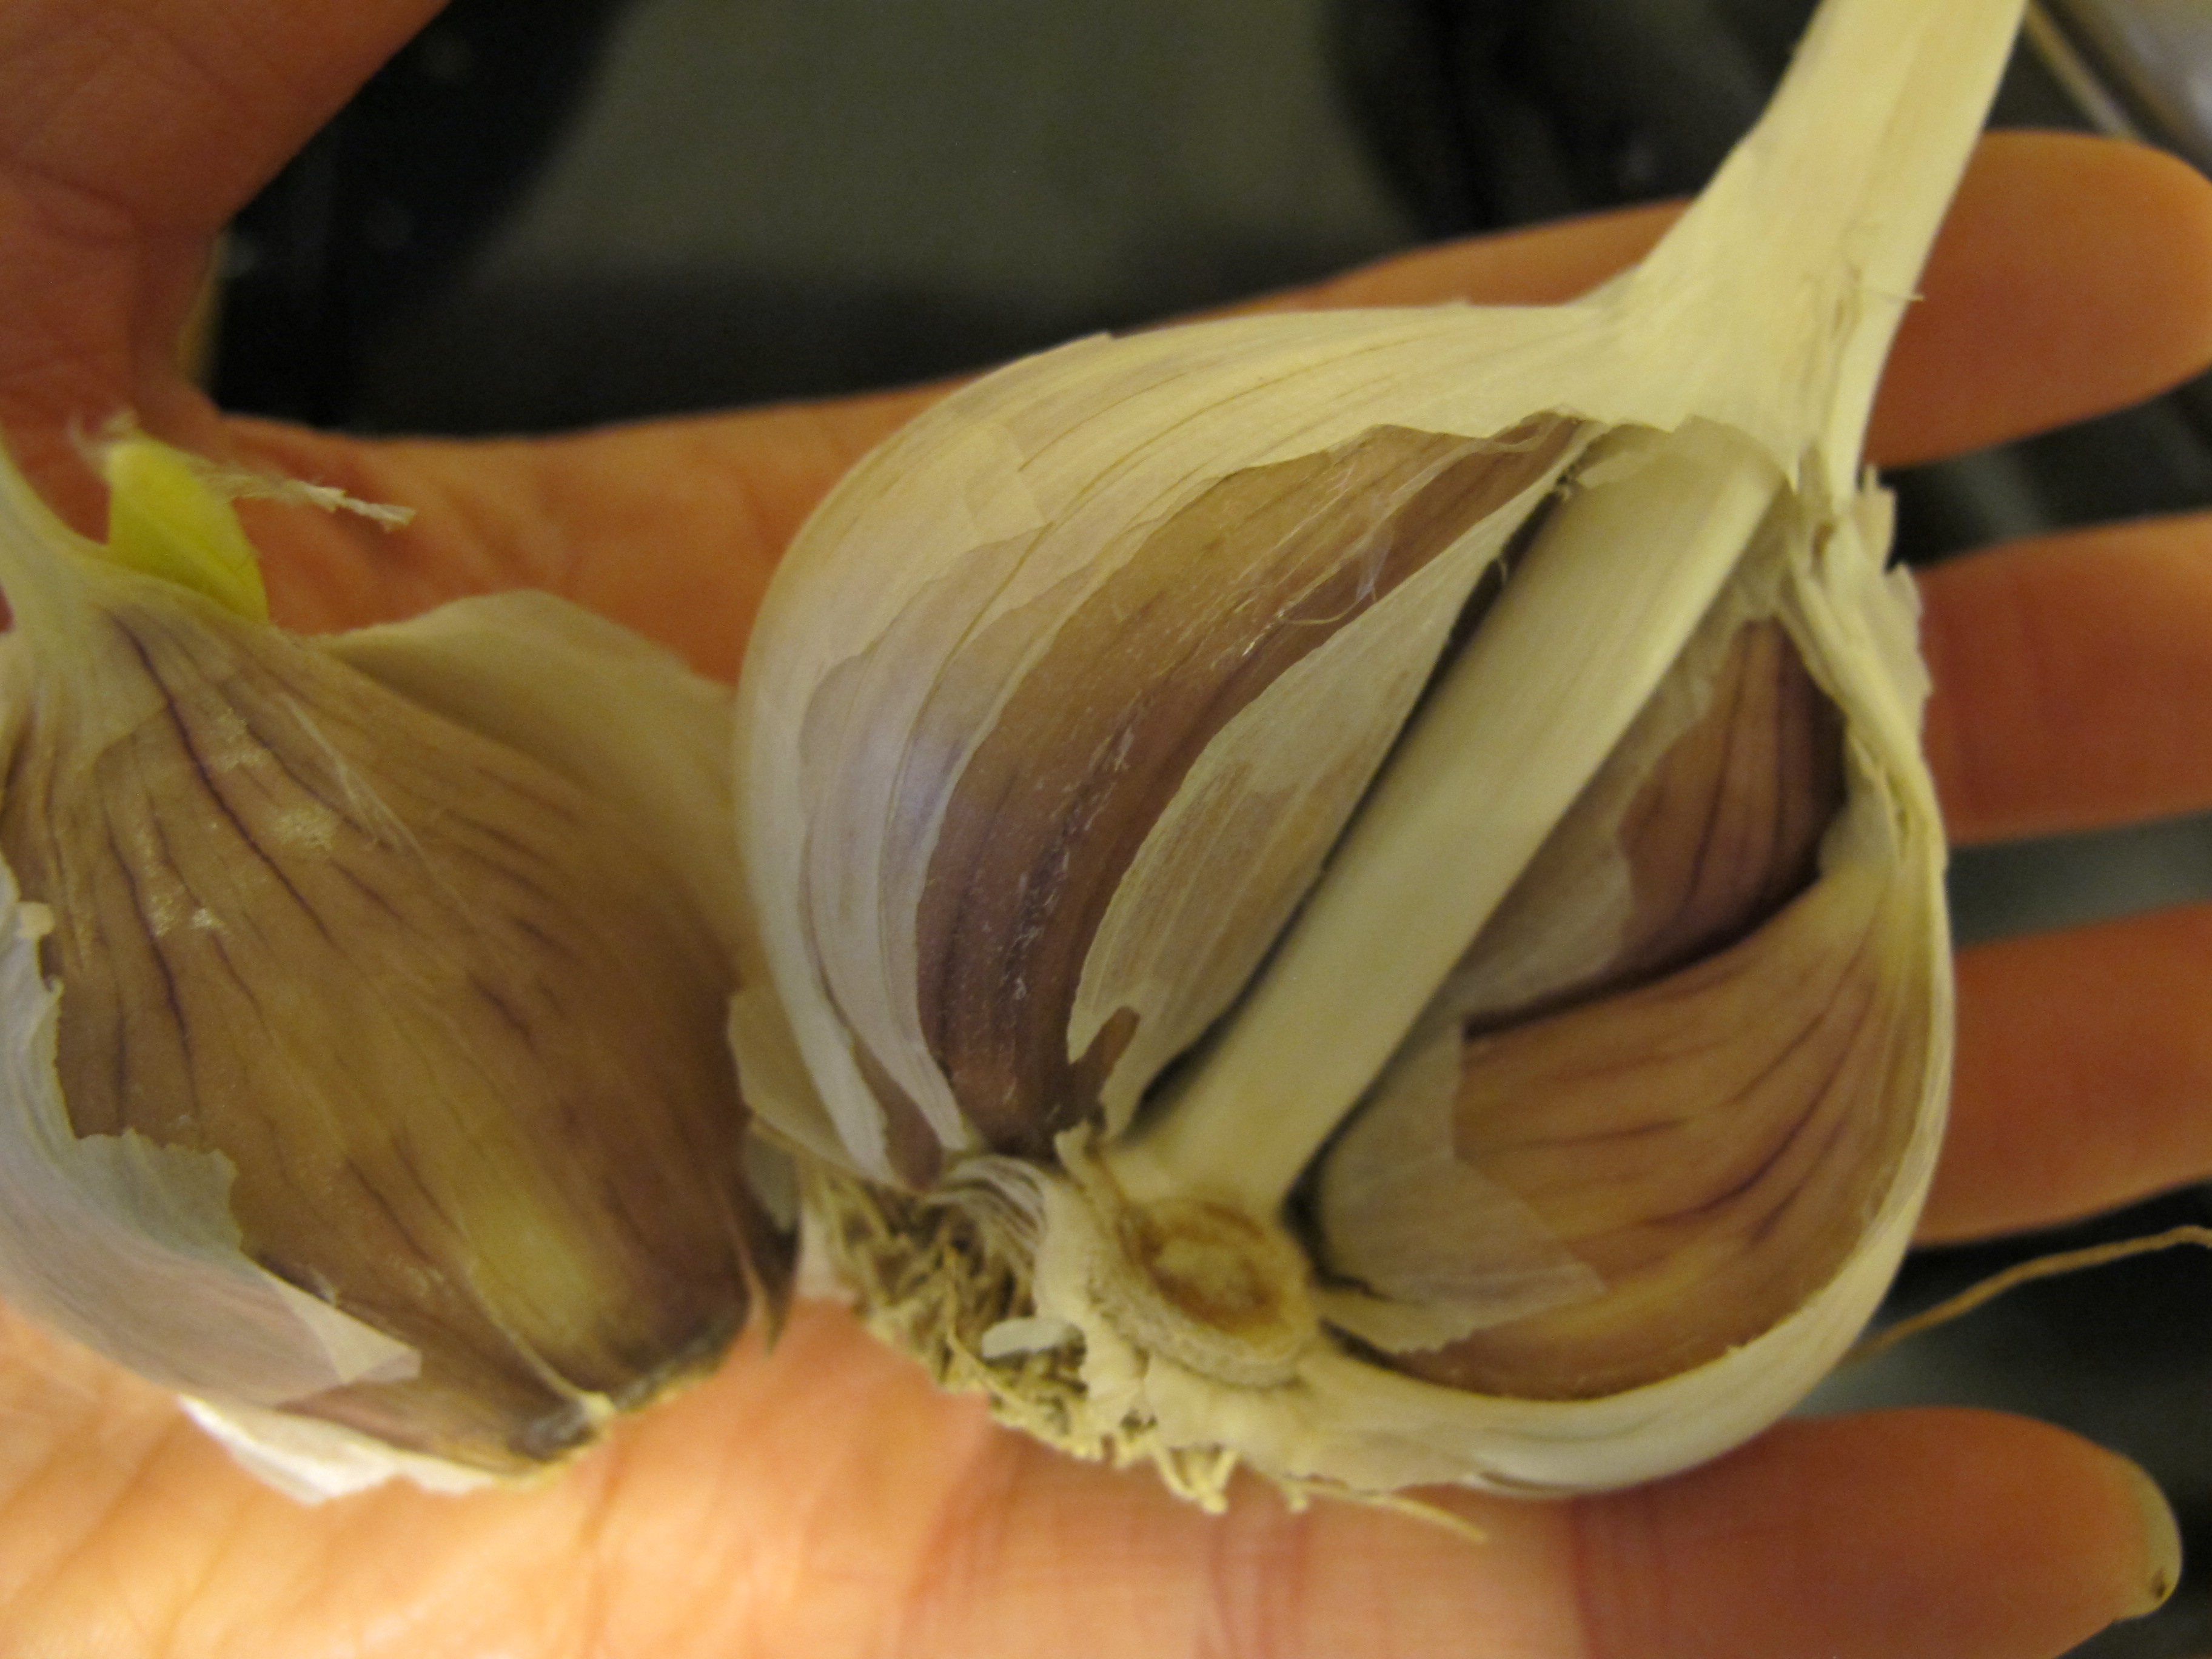
So, here we are in early March, with our last bulb of garlic (yes, our kitchen counter tops are, in fact, purple).
A bulb in the hand . . .
This guy started to sprout, but with four or five nice, still-firm cloves, I had no complaints.
After stretching things out as long as possible with a jar of minced garlic we received as a gift, it was time.
I used our last bulb of garlic in veggie fajitas on Thursday night. In my effort to not overcook the garlic, it ended up a bit on the raw side — not ideal, but what can you do?
We currently have over 400 bulbs of garlic in the ground, waiting for harvest in June. Though we’ll be saving some for planting next year, we may have enough to get to this point next year without supplementing. Until then, I guess it’s back to the store for garlic.
As I put away our leftover honey beans on Monday night, I happily realized that the fridge held enough leftovers to provide lunches for the rest of the week. That knowledge removes the pressure to continue making big, leftover-yielding dinners, buying me an easy night or two of sandwiches, pasta, or leftovers for dinner instead of just for lunch.
In order to keep track of all the leftover goodness and avoid food waste, I grabbed a piece of scratch paper and sketched out our lunches for the week.
The full lunch menu — most of the veggies in the dishes are locally grown:
Monday: Kale quinoa quiche with a side of squash Tuesday: Black bean soup w/avocado and tortilla chips; side of collard greens Wednesday: Rotini w/red sauce and sauteed eggplant, ‘shrooms, and squash Thursday: Polenta topped with black-eyed peas, collards, and sundried tomatoes w/a side of roasted sweet potatoes Friday: Honey beans, whole wheat bread w/olive oil, sides of squash and kale
On the top half of the page, I brainstormed dinner ideas based on what we had to use and what types of food (i.e., rice, lentils, tofu) we haven’t eaten in awhile.
Our fridge full of leftover goodness (and a huge hunk of rising Danish pastry dough, second shelf from top, on the right). A bit crazy, but I have a pretty good mental map of what is where, and this is nothing compared to high gardening season when we’re truly overflowing with fresh produce.
In case you were wondering, I have yet to use my “coasting” dinner (many weeks I don’t — it’s just nice knowing I have a cushion, if necessary). Tuesday night I made risotto (recipe coming soon) and Wednesday night I made a variation of my Persian stew, with lentils instead of chickpeas and [garden!] cabbage instead of cauliflower.
A couple of years ago, we ran into some friends at the Festival of Nations. They had already eaten, so we asked if they had any favorites, and they quickly recommended the African honey beans from the Nigerian food stand.
We took their suggestion, thoroughly enjoyed our honey beans, and started counting down the days until the next year’s festival so we could get our fix. In the meantime, of course, we played with the idea of making our own, but neither of our go-to international grocers (Jay’s and Global) carried the beans, a variety of black eyed peas that are inherently sweet.
Gabriel’s first taste of honey beans — yum!
This year, we visited the Nigerian stand again and asked the proprietor where we could purchase the dried beans. She directed us to Worldwide International Foods and African Grocery, a small store on Olive (just east of I-170) in UCity. The store in question is decidedly outside our normal walkable/bikeable radius, and it’s also not an area we frequent in the car (unlike the suburbs where my in-laws live and the TJ’s/WF shopping area).
Anyway, I attempted a bean pick-up back in early November, when I visited a friend who lived not too far away, but they weren’t open. Still no honey beans.
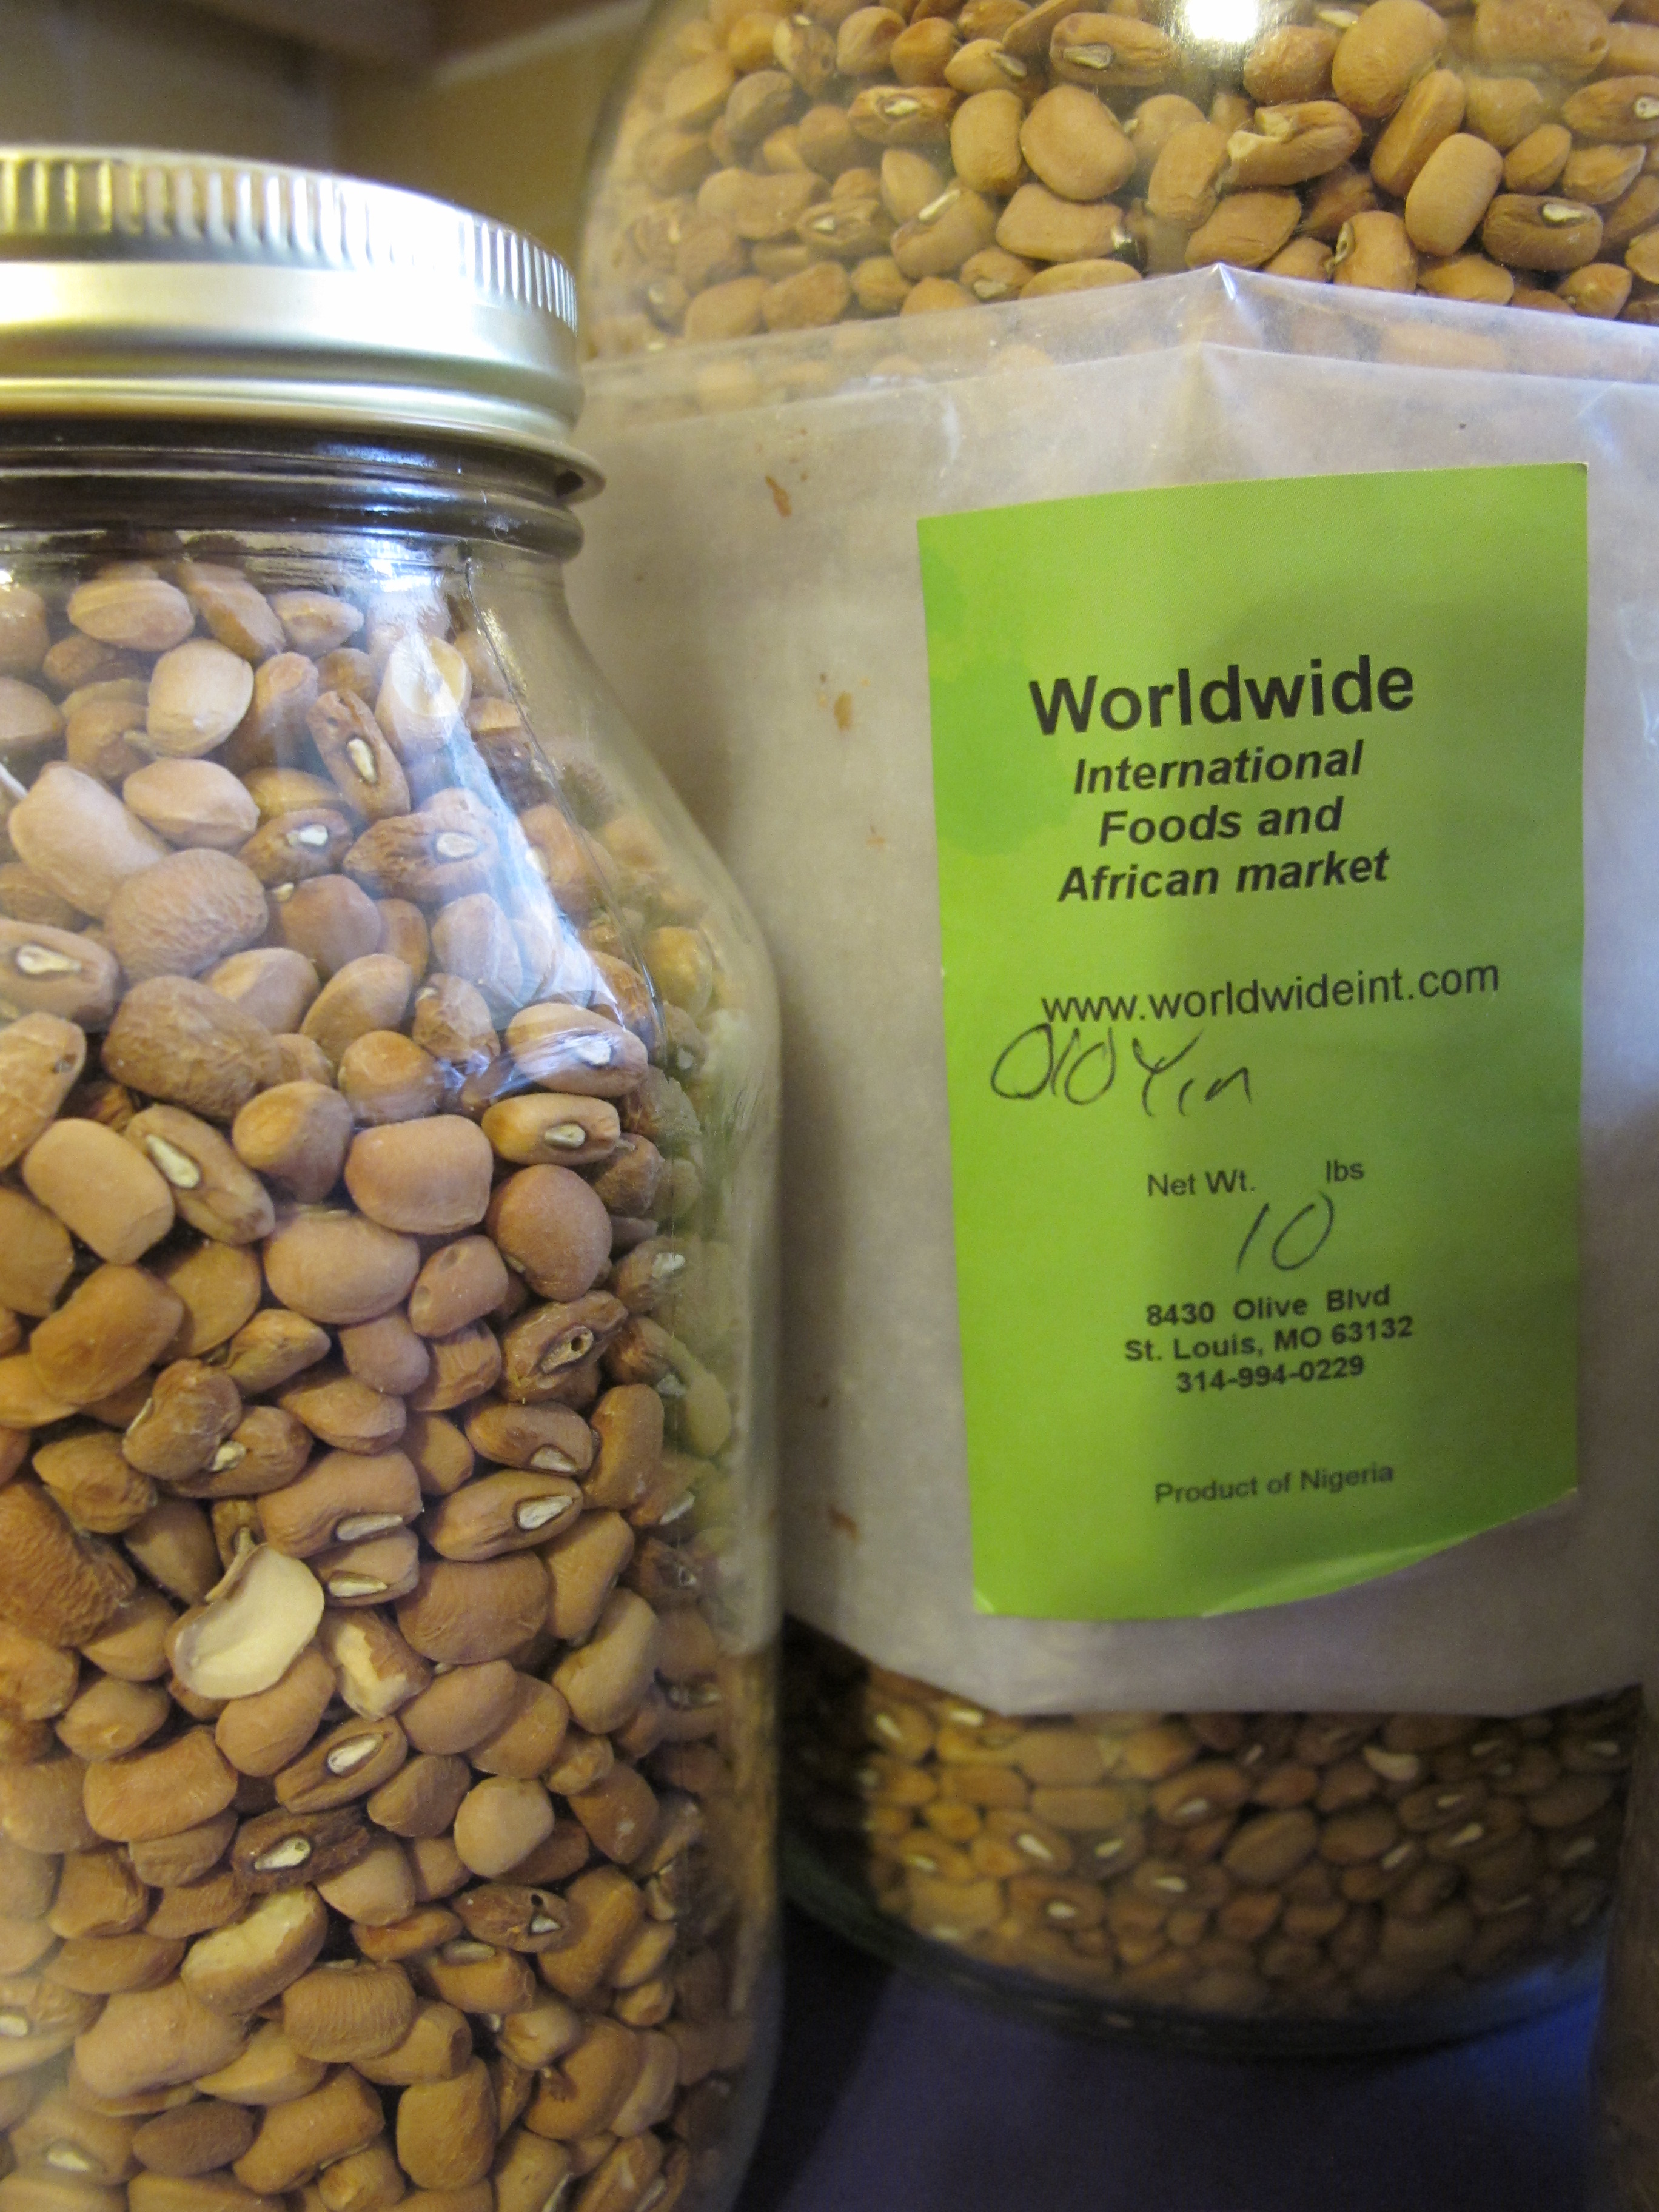
They fell of my radar until then I saw the article on honey beans in last month’s Sauce Magazine. Interest renewed. I wrote down the store address, called to check the hours, and jotted down the Yoruban name for the beans, “ewa oloyin,” in case that would make my quest easier.
Yesterday, with plans to look at a few houses just off of Olive, I made a second attempt, this time successful (well, sort-of). They were down to two bags of “oloyin” on the shelf, a two-pounder and a ten-pounder. We eat a lot of beans, and it had taken me FOREVER to actually get to the store and buy the beans, so I opted for the ten-pounder. When I checked out, I confirmed with the store clerk that the beans in the bag were, in fact, honey beans, since the label just said “oloyin.” He assured me they were.
With limited time until dinner, I used the quick soak method on the beans and worked on my rendition of the sauce while they cooked. When I tested the beans for doneness, they surprised me with their lack of sweetness — not a good sign.
Either a) the beans I purchased were, in fact, NOT honey beans, or b) they prepare the dish sold as honey beans at the Nigerian food stand with significant added sugar. (The annoying part is I don’t know how to find out if I bought the wrong beans.)
Anyway, I try to keep sugar consumption fairly minimal, especially for Gabriel, so the last thing I wanted was to dump a ton of sugar into the bean pot. I compromised by adding some dates (sugared, not what I usually buy, but this seemed like a good place to use them) to the sauce. The resulting dish, while not identical to what we had at Festival of Nations, was mildly sweet and quite flavorful.
Ingredients 3 c. dry honey beans*
1 c. bean cooking liquid (for the sauce)
1/3 c. chopped sundried tomatoes
1 c. chopped red bell pepper
1 t. onion powder
1/4 c. dates
1 vegetable bouillon cube
1 T. butter
2 t. peanut oil
1 T. coconut oil
Directions Soak beans, either overnight or using a quick soak. Drain, rinse, return to pan, add water just to cover, and simmer until tender but not mushy (about 45 minutes for this batch).
When beans are cooked, pour off most of the cooking liquid into a measuring cup and salt the beans. Combine one cup of the liquid with the sundried tomatoes, bell peppers, onion powder, and dates. Blend to a smooth, thick sauce using a hand or regular blender.
Combine all three oils in a small saucepan over gentle heat.** Add bouillon cube, cook for a few minutes, then add the sauce from above. Stir to combine well, then pour over the beans in the pan.
*The beans I was using may or may not have been actual honey beans — I may never know. The good news, if you, too, have trouble locating honey beans, is that you can probably replicate this dish with other beans (perhaps black eyed peas or a small white bean, like navy beans).
**Palm oil would be traditional in this recipe, but the labor and environmental practices around farming palm oil are pretty atrocious. The blend of oils/fats I used here was quite flavorful and worked well in the dish.