Spring mindfulness

This past weekend marked my first weekend-long mindfulness retreat!  My mom and I spent Friday evening, all day Saturday, and most of Sunday at a non-residential retreat hosted by Mid America Dharma.

I went into it thinking that the weekend’s beautiful weather would be lost on us, but that was not the case.  The retreat alternated sitting meditation with walking meditation, so we were able to get quite a bit of fresh air while enjoying the just-opening daffodils, the sounds of tree frogs and birds, and the view overlooking the Mississippi River.

The retreat was both rewarding and challenging.  Friday night and the first 2/3 or so of Saturday went down quite easily; it felt like a port in a storm after a rather challenging week.  A period of mindful movement followed Saturday’s lunch hour (mindful eating), and after that, I hit a wall.  Both my body and mind wanted to curl up in a ball and take a nap, but that was not on the schedule.

The next sitting meditation was agony, both mentally and physically (my neck hurt a lot); it wasn’t pretty, but I kept returning to the breath, and I made it through.  I regrouped during the walking meditation that followed, and then, for the final sitting of the day, I was kind to myself, and used a side-lying meditation posture.

Sunday was a little challenging, but it helped knowing that I only had to make it to 3pm.  While there were times I struggled throughout the weekend, on the whole I’m thankful that I was able to make the time to deepen my mindfulness practice in this way.

I’m not sure whether or not it will happen this year, but I would like to experience a similar-length (not yet ready for a week-long!) residential retreat, which will be a very different experience than going home to “normal” life in the evening and morning.  While a residential retreat is, in some ways, my top priority, I may first have the opportunity to take part in another non-residential retreat.  There is one coming up in June which focuses on “Awakening Joy” — that might be too good to miss!

While I was engaged in formal mindfulness meditation practice, Matthew spent the weekend engaging in his form of meditation — gardening!

The cold and wet of the past few weeks meant this was his first opportunity to get his hands dirty.  He took full advantage of the cooperative weather, spending all day Saturday AND Sunday at the garden . . . IMG_7124

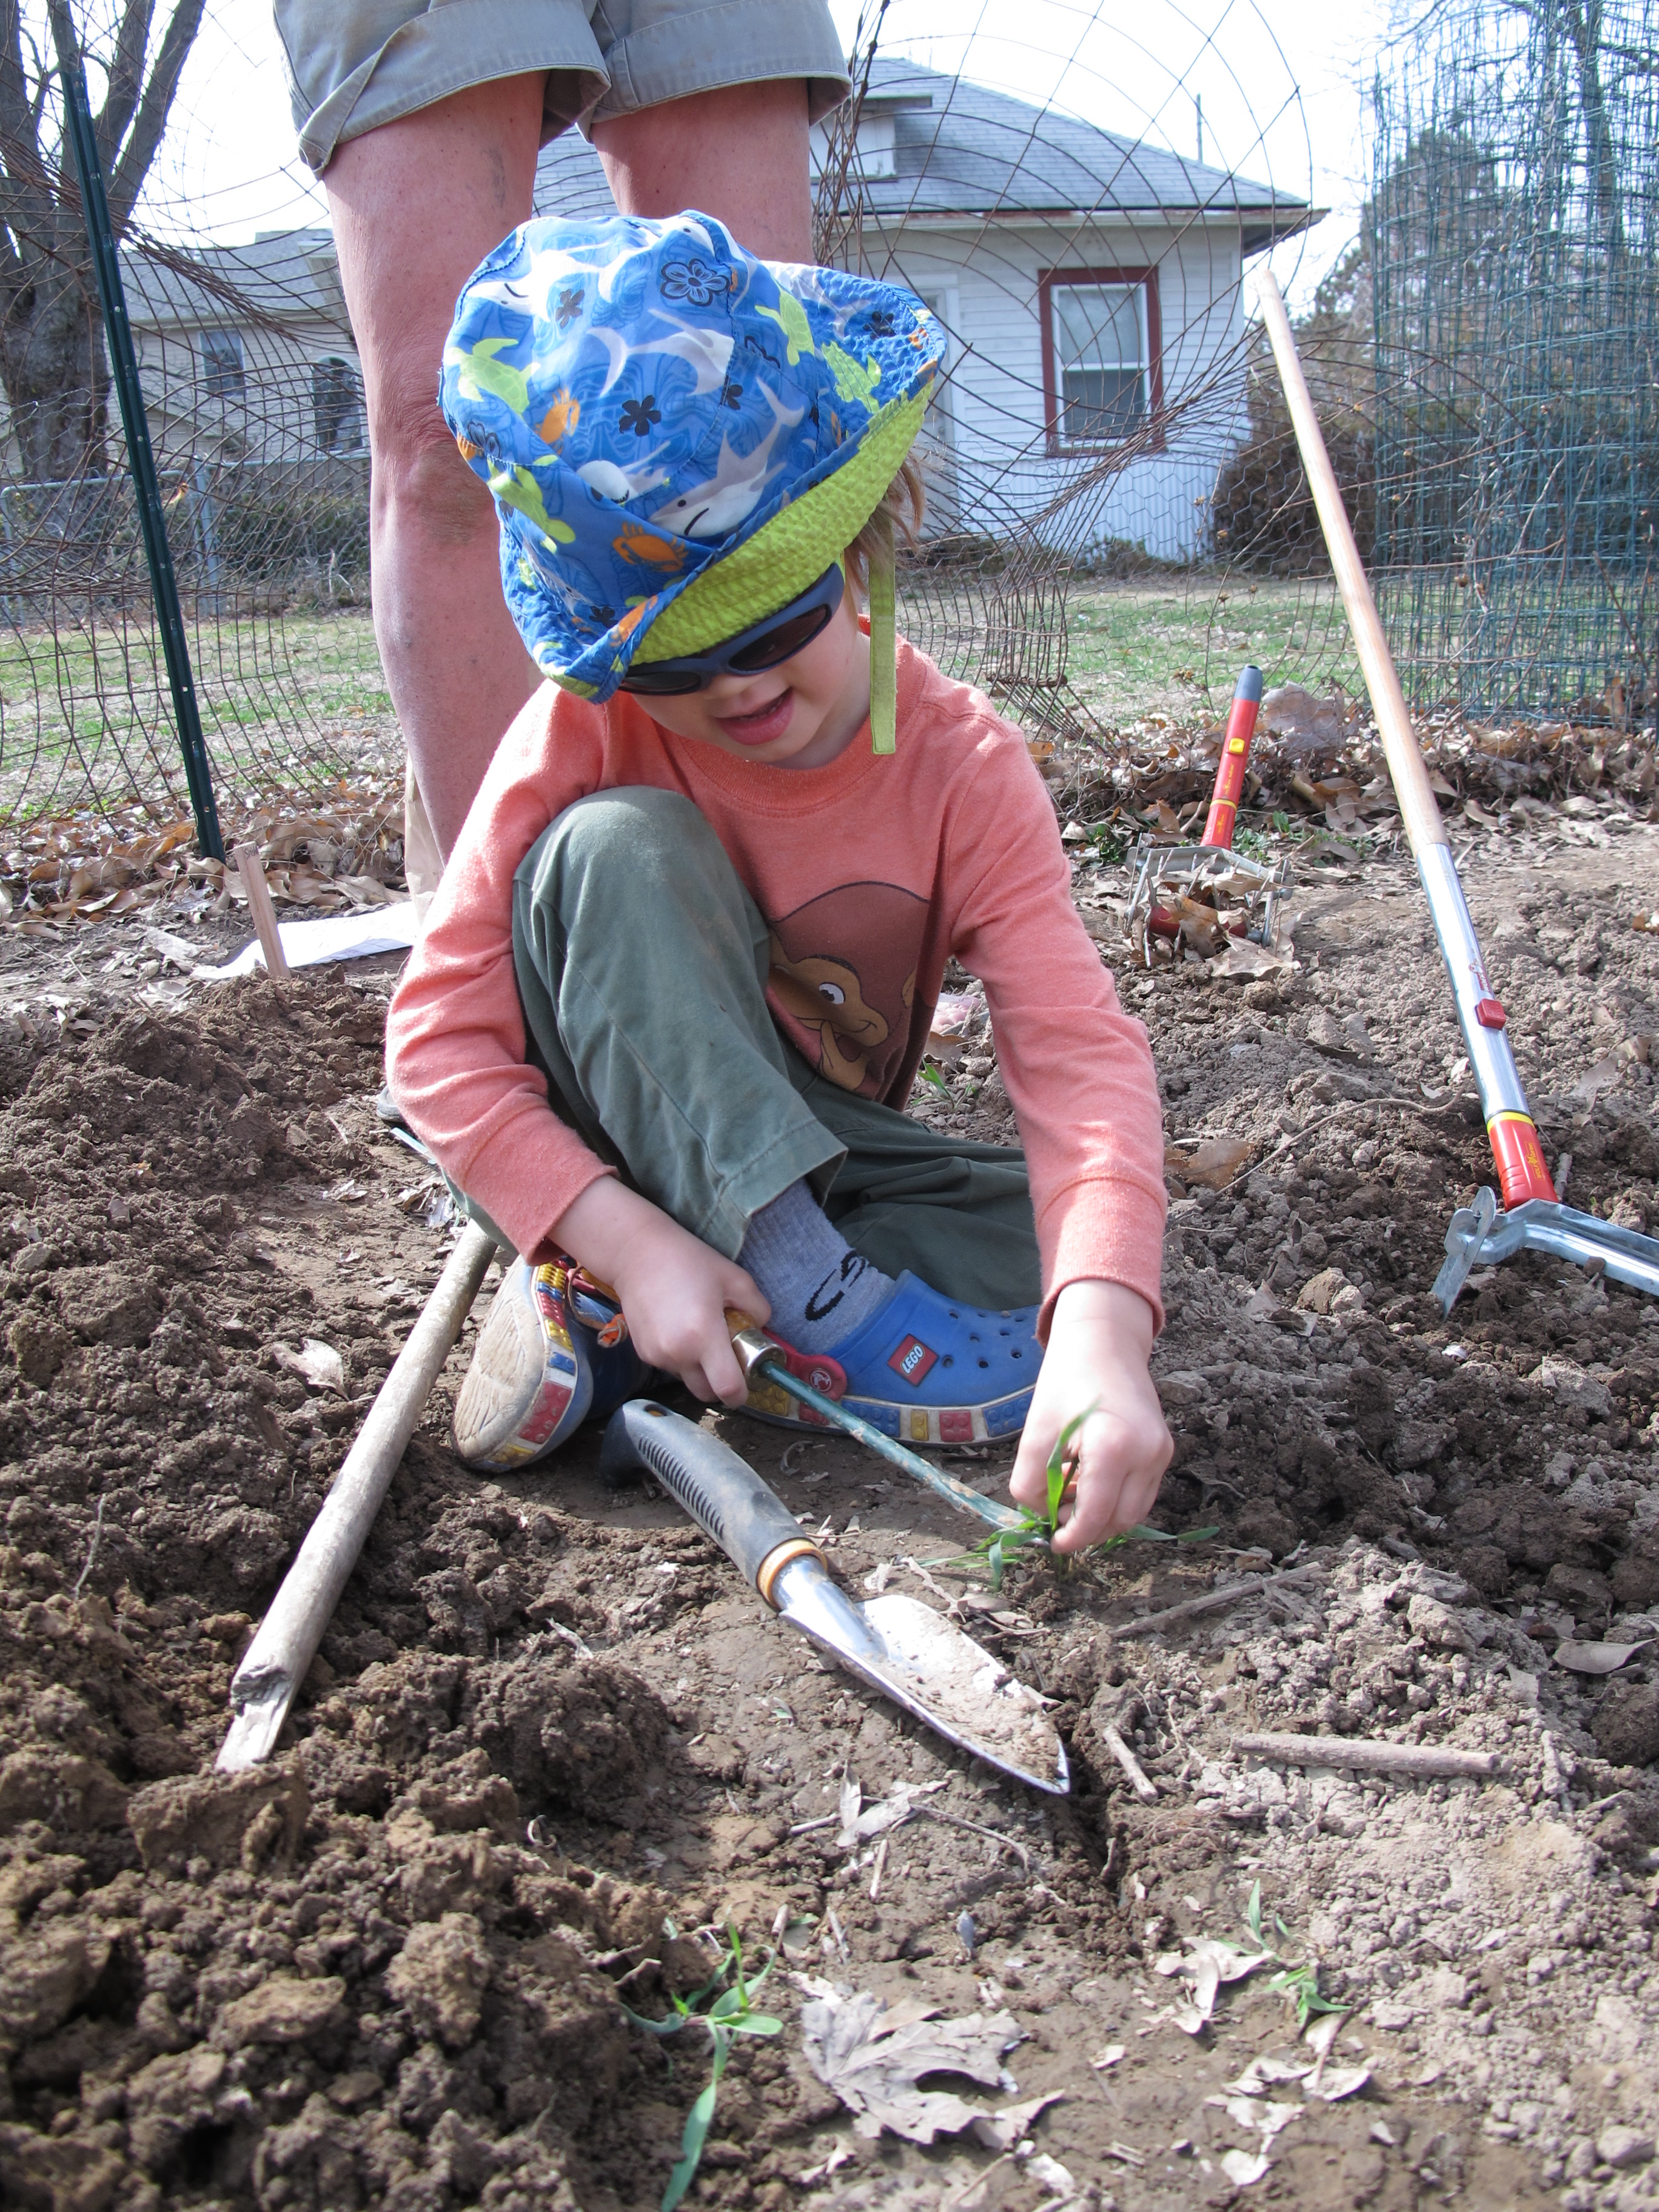
. . . with a helper, of course!

Along with my MIL, my garden boys planted all of our onion & leek starts, lots of seedlings (cruciferous and fennel), and potatoes.  New in the garden this year is the Earthway Seeder — Matthew estimated that this saved him four hours of work, just this weekend!

They returned with a lovely harvest of kale and arugula from under the low tunnel, plus some more goodies from last year’s harvest — the last of the potatoes (we still have quite a few to eat!), plus frozen green beans, broccoli, and sweet peppers.  Time to eat up!

Garlic taste test

Guest post by Matthew; a follow-up to this post about growing garlic in the Midwest.

This was my second try at taste testing garlic, and I broke this year’s tests into two parts because I had 19 samples to try/compare.  I hope to do a tasting party at some point to get other opinions, but for now, all we have is my one set of taste buds.  (Melissa here to say that I did weigh-in on some of the garlic tasting!)

It’s also a tiny bit tricky thinking it was entirely fair, as some cloves were larger and needed longer to roast, or smaller and less time, and some seemed to sauté faster.  How do I get them all equally cooked?

That said, I think this is a reasonable testing and comparison.  I didn’t find the wine-like distinctions many garlic growers report in my cooked samples.  I don’t eat raw garlic (other than small amounts in pesto, hummus, etc.), so I didn’t bother tasting it that way.  I did find tastes that varied in being more or less full flavored, more or less hot, or neither and just downright watery.

My elephant garlic this year seemed to have an “off” taste in both roasted and sautéed tests.  Without the off flavor I don’t mind bland sometimes, for example, when I really just want the amazing creamy texture for a dip or soup that doesn’t need to be garlic-heavy.  Elephant garlic can be an easy way to get large amounts of mild, roasted garlic puree.

I don’t recall the off flavor from previous years, but coupled with my data that it just isn’t all that productive per square foot, it has been bumped way down in the pecking order of growing square feet.

I found my Inchilium Red to be rather bland, which is at odds with other taste tests, but could be my growing conditions, my seed stock, or weather conditions.  I’ll grow it another year or two, and do another taste test or so before I eliminate it overall.

I do have some low grade issues with brown spots on some of the garlic, possibly a fusarium (a fungus that can affect garlic) issue.  I rotate my crops, but I save my own seed stock.  I’m considering peeling at least one clove from every bulb next year to try to minimize how many spotted cloves get planted.

Otherwise, my tasting results are below.  You’ll notice that some are better roasters, others sautéed, and some are meh.  I’m using this data, and will be keeping track of how long each variety stores before deciding which ones I’ll grow long term, and which ones to cull from my stable.

I ranked each type and preparation on a scale of 1-5, where 1 is awful and 5 is awesome.

GarlicTasteResults

Combining the taste test data with the productivity, I think I’ll give everyone another chance, but if the data remains stable, I’ll probably keep the eleven below, and possibly some of the new ones I’m trying this year. That said, I’m eliminating eight varietals, which is a huge step forward for me!

TopGarlic

Creamy celeriac soup

Nothing says fall is here like beautiful (or slightly funky, in the case of celeriac) root vegetables and chilly weather that invites turning on the oven to roast said veggies.

This recipe started with a desire to make a creamy soup based on celeriac (AKA celery root). Celeriac is a rather humble vegetable.

IMG_5917[1]

Beneath the dirt and gnarly exterior is some good stuff.  (We sell a lot of our celeriac to Five Bistro; it’s on the menu now, in fact!)

You can always chop up veggies, boil, and puree them, but basing the soup on roasted veg really amps up the flavor.  I discovered that starting with a covered dish for the first twenty minutes of roasting, followed by spreading the vegetables in a single layer on a baking sheet and roasting for an additional 30-40 minutes, worked really well for both celeriac and carrots.

I used a fairly generous amount of oil for roasting and generous butter for sauteing the leeks.  This approach yielded a rich, creamy soup without actually requiring cream.

CREAMY CELERIAC SOUP
Recipe by Melissa
Serves 4-6

Ingredients

2-3 celeriac, depending on size
8 carrots (you won’t use all of these in the soup, but you won’t regret having extra roasted carrots, trust me!)
1 large leek
4-5 small potatoes (or equivalent larger)
1 bay leaf
butter and/or olive oil
salt & pepper

Directions
Preheat the oven to 425° F.  Prep the celeriac by cutting off the tough outer layer, then cutting into large chunks.  In a large, lidded Pyrex baking dish, toss the celeriac chunks with olive oil and salt.  Bake in covered dish (use a baking sheet set on top of the pan or aluminum foil if you don’t have a lidded dish) for about 20 minutes.

Prep the carrots by cutting into carrot sticks.  Wash and chop the leeks.

Once the celeriac has roasted in the covered baking dish for 20 minutes, use a slotted spoon to transfer to an oiled baking sheet (minus any accumulated liquid in the pan).  Roast on the baking sheet, uncovered, for 30-40 more minutes, stirring once.

In the same baking dish you used for the celeriac, toss the carrots with some olive oil, cover, and roast for 20 minutes.  After 20 minutes, follow same procedure for transferring to a baking sheet and roasting, uncovered, for an additional 30 minutes.

Chop the potatoes (large chunks), and cook with a bay leaf and 5-6 cups of water, and 1 t. salt.

Saute the leeks in butter, over low heat.

Once your celeriac and carrots are roasted, potatoes are boiled, and leeks are sauteed, you’re ready to blend.  For this soup, I pureed all of the potatoes, most of the celeriac (reserved some to chop smaller and add to the soup as chunks), most of the leeks (again, reserved some to garnish the soup), and about 1/4 of the total carrots I roasted.  Use the cooking water from the potatoes as your broth (just remember to remove the bay leaf before pureeing!).

Working in batches, blend until you have a nice, smooth, creamy soup.  Add more or less of the broth (or additional water) to reach a consistency of your liking.  Salt and pepper to taste, and add the reserved leeks and celeriac chunks.

We rounded out the meal with a side of greens and [whole wheat] bread spread with roasted garlic.  Oh, and some of the extra roasted carrots!

Growing big, beautiful onions

I must say that, as the end-user, the larger onions Matthew grew this year are fabulous.  It’s a lot easier peeling one big[ger] onion than lots of tiny ones — this chef is very happy!  Now on to the guest post by Matthew . . . .

I’ve been trying to grow an onion that I’m satisfied with for years.  I kept getting small onions.  Finally, this year, things went well.  I started last December by planting four seeds per 1.5″ x 1.75″ soil block.  I believe this careful regular spacing was important.  Previous years I scatter-seeded and wound up with plants too dense to grow well.  This year I got nice thick pencil-sized of onion starts for transplanting.

I grew Aussie Brown, Stuttgarter, Brown Spanish, Red Amposta, Bronze Amposta, Valencia, and Sierra Blanca.  The Bronze Amposta, Valencia, and Sierra Blanca are sweeter onions without a lot of storage life, but they produced very well for me.  The Bronze Amposta is supposed to have a 3-6 month storage life, so that’s probably my best bet of the bunch, and what I focused a lot of production on this year.

This year was also complicated by a trip out of town right when the Ampostas and the Valencias were wanting to finish growing.  I compromised and harvested most early, to avoid risk of them rotting in the ground, but I left a few Valencias to see what happened, and, wow, did they bulk up in that last two weeks the others didn’t get.  Granted that could have also been all the extra space they had, but I expect it was mostly the time . . . .

OnionTable

As you see, my Valencia late harvest was the champion.  The Bronze di Amposta may have rivaled them had I let them keep growing.  The Sierra Blanca mostly grew to maturity, so I think that is about the size I can expect.

I’ll probably keep brown Spanish in the mix as a longer storage onion (10 months), and do a very few of the others I grew this year to repeat the experiment, but I think I have my primary four onions I’ll be growing unless any other onion wows me.

IMG_5816

These were transplanted out at 6” spacing, kept well weeded, and heavily mulched with leaves as soon as they were big enough.  I think I might mulch first and plant through the mulch next year.

I’m also growing leeks, shallots, Egyptian (top-setting) onions, and potato onions (from SESE).  Leeks and Egypt onions for greens are certain keepers.  So far the shallots and potato onions are looking pretty good, too.

Optimizing garlic growing in the Midwest

Guest post by Matthew, in which he geeks out on growing garlic in St. Louis, complete with a crazy-detailed spreadsheet 🙂

One of the challenges of gardening is that things that work well in one place, with one soil and climate, don’t work the same way in another climate.  While it isn’t perfect, the best data comes from places that are near where we’re wanting to garden.  I haven’t found a lot of detailed information and recommendations for my Midwestern climate with hot, humid summers, cold winters, and fast weather changes.  (If you have suggestions, I’d love to add to my reference library.)  Because of this, I do quite a bit of experimenting with different techniques, spacings, varieties, etc.  We’ve posted some of my results about carrots before, but today is all about garlic.  Onions will come in another post.

We did one garlic tasting last year.  We were unimpressed with the practical differences in taste when used as we normally use it, or really even in the roasted product.  Granted, my roasting protocol could use some work.  If you have a foolproof recipe for all different kinds of garlic, please let us know.  Normally we just add a bulb to a dish of other food, and I think as long as it’s pretty garlicky, it’ll do.  I do plan to try tasting again this year, but unless something impresses me, I think I’ll be weeding out a lot of my lower performers, or at least cutting them way back and trying to grow them from bulbils to see if they grow better with a fresh start free from soil disease.

That said, I grew 24 or 25 different kinds of garlic last year, and eliminated those that were most diseased or unsuited to my climate.  This year I grew 17 kinds, plus elephant garlic, and took data for comparison.  This is not a great study, as the sample sizes vary, and the growing conditions vary some, but it’s a decent set of data to start from, and much better than the information I’ve been able to find.

I asked myself what I’d need to compare garlic…

First I thought number of bulbs, total weight, and average weights for each variety.

But wait.  My “Main Crop” tends to have only 4-6 huge cloves, while Inchilium Red has 8-10 plantable cloves per bulb.*  For a fair comparison, I needed to know the number of bulbs, and the weight, that had to be devoted to replanting the same amount for next year.  I needed more data.

My, that’s a lot of data (see PDF linked below for full data table).  But hmm, this still doesn’t take into account the planting density.  I mostly used 6″ spacing between plants, but planted a few sub-plots at 4” spacing, and the elephant garlic had 12” spacing.

I realized the productivity was probably my best measure, and that I could capture that with lbs of eaters per square foot total needed to grow the variety, including the footage for replants.  To get that I added the sq feet total for variety including replant, lbs of eaters, and productivity (shaded in gray in the PDF linked below).

Garlic for blog Planning 9.15.2014

When I added that in, I also adjusted the elephant garlic for space, and it’s productivity came out as low middle of the pack.  The Broadleaf Czech at 4” was essentially just as productive as Broadleaf Czech at 6”, but no better.  I’ll repeat the experiment on a small scale, but it certainly suggests that for Broadleaf Czech, and possibly other softneck varieties, the 4” spacing is just too tight.  Why have smaller cloves if you can have the same total weight and larger cloves?

On the other hand, Main Crop at 4” was significantly more productive than Main Crop at 6”:  7.48 oz/sq foot vs. 4.85 oz/sq foot (possibly contaminated with Music or Russ Giant) or 3.86.  4” was between 1.5 and 2x as productive.  Since it only has 4-6 cloves generally, I’ll probably continue trying significant amounts of 4” Main Crop, and possibly other high yielding hardnecks too.

So, for St. Louis, from my data, German White (a.k.a. German Extra Hardy or many other names), Russian Giant, Silver Rose, Inchilium Red, Broadleaf Czech, Asian Tempest, Siberian, and Shantung Purple, Kettleriver Giant, and Elephant Garlic (in order of productivity).  I’ll grow a little of the others to check my data next year, and I may start growing some from bulbils to see if that increases the yield of the other cultivars . . . IF my taste test reveals that it makes a difference for our uses.  If not, I’ll just focus on the top ten producers, and once I have results from a few years, drop it down to the top three to five.

Other garlic resources:

*Our best guess is that our “Main Crop” is German White/Extra Hardy, but we’re not quite sure.