Garden in my salad bowl

With a variety of lettuce types, as well as abundant arugula and spinach, salads have graced our table quite frequently in the past two weeks.

At their simplest, I dress salad greens with vinegar (or lemon juice), salt and/or honey, and a drizzle of good olive oil.

Once you have a base of greens, the add-ins are limitless.  Here are some favorites:

  • Nuts or sunflower seeds (toasted/roasted for optimal flavor)
  • Black beans or chickpeas
  • Dried fruit
  • Roasted beets
  • Grated Parmesan cheese
  • Goat cheese
  • Tomatoes, in season (i.e., not yet here)
  • Avocado
  • Marinated tofu
  • Frozen corn or peas, thawed

I recently made this Asian-inspired salad with the idea of creating the flavors of a spring roll without the work of actually wrapping the filling.

IMG_1936

Base of greens with rice noodles, thinly sliced garden veggies (including radishes, carrots, and asparagus), green onion, cilantro, and marinated tofu, in a dressing of seasoned rice vinegar, toasted sesame oil, soy sauce, chopped peanuts, minced garlic, and a dash of sriracha chili sauce.  It totally tasted like a spring roll in a bowl!

After spending Monday morning in the garden, the strawberries were calling.  I detoured by the store on the way home to pick up goat cheese for this salad:

Photo05271237_1

Base of spinach and arugula, tossed with sea salt and good balsamic vinegar, then allowed to sit and wilt slightly.  Topped with sliced (and lightly sugared) strawberries, toasted pecans, goat cheese and a drizzle of olive oil.  Yum, just what I had in mind!

Your turn
Any favorite salad combos that you’re enjoying these days?  I love suggestions, because even with all the options, it’s easy to get in a rut!

Broiled asparagus

During the summer between my junior and senior years of college, I worked as a live-in nanny for a family in New Jersey.  Food-wise, it was a summer of firsts for me.  I’d never been big on seafood (perhaps rightfully so, having grown up in the Midwest), but in those months living on the East Coast, I enjoyed trying scallops and various types of fish.

My seafood eating days were short lived, as I became a vegetarian and stopped eating meat and seafood entirely a few months into my senior year of college.  However, not all was lost from that summer, food-inspiration-wise, as the family I worked for introduced me to the joy of broiled (or grilled) asparagus.

While enjoyable (if not overcooked), steamed or boiled asparagus doesn’t hold a candle to the broiled version.  I’ve used this preparation for every single stalk of our delicious, if modest, asparagus harvest this year (minus those stalks nibbled raw).  Sir usually devours his portion and begs for more from our plates.

Asparagus is in-season NOW, so head to the nearest farmers’ market this weekend, and enjoy some fresh, locally grown goodness!

IMG_8329

Broiled Asparagus

Ingredients
5-8 asparagus spears per person
Olive oil
Sea salt
Pepper, garlic powder (optional)

Directions
Break off bottom half-inch of asparagus stalks and discard.  Place clean, dry asparagus in a single layer on a broiler tray.  Preheat broiler.

Brush asparagus stalks with generous olive oil, then sprinkle lightly with sea salt and other seasonings, if desired.

Cook under hot broiler for 10-12 minutes, stirring once to turn the stalks.  Serve immediately.

IMG_8706

Toaster oven vs. Oven vs. Grill
If you’re preparing 1-3 servings, a toaster oven is the perfect tool.  It heats up quickly without heating the entire house.  A counter-top grill functions similarly.  For a larger crowd, fire up the broiler in your regular oven.

A hot grill produces a similar effect to the broiler, with the addition of a smoky flavor. We don’t use the grill all that often, and it’s not worth firing it up just to cook asparagus.  If you’re grilling other food anyway, this is a great option — just toss the spears directly on the grill (perpendicular to the grates so the spears don’t fall into the fire).

Umami tsunami: Three ingredients to try today

Over the past several months, I’ve enjoyed playing with some umami-boosting ingredients in various dishes.  Umami is sometimes described as a savory or meaty taste or, more simply, something that makes food taste good.

Despite its association with meat, it is quite possible to build umami flavor in vegetarian dishes — mushrooms or soy sauce are a quick and easy route (the title for this post popped into my head while eating a dish containing both mushrooms and soy sauce) — but there are other ingredients and methods.

1. Dal
I first started experimenting with dal (daal) back in August, when  my food swap with Nupur started an Indian cooking kick.  Dal describes any of a variety of split peas or beans.  I began my explorations with two four pound bags of dal: toor dal (split yellow pigeon peas) and moong dal (split mung beans).

I discovered that well-cooked dal, simmered with bay leaf and seasoned with various spices, makes a rich, savory vegetable stock.  I use the stock for a variety of soups and stews, and the dal provides a nice flavor and texture boost.  I also made one of my best batches of chili ever with a dal base.

Depending on the size of your soup recipe, and assuming you aren’t trying to make lentil stew, start with 1/4 to 1/2 cup dry toor or moong dal (or a combination).  Early in the day, cover the dal with water to soak.  When ready to use, rinse in a mesh colander, add a bay leaf, and cover with water to cook.  When tender, liquify with an immersion or traditional blender and incorporate into your soup recipe.

2. Nutritional yeast
Nutritional yeast is a fairly common ingredient in vegetarian cooking, providing a nutty or cheesy flavor.  As its name indicates, it’s also rather nutritious, a great source of B vitamins in addition to being a complete protein.

I add nutritional yeast to a variety of one-dish meals (grain + beans + veggies) to boost flavor and nutrients.

Look for nutritional yeast in the bulk bins at natural grocers or WF.  The price per pound (~$7-$8) seems high, but the yeast flakes are very light — one pound of nutritional yeast can enhance many meals.

To use, add directly to dishes, or mix with a small amount of hot water to make a sauce.  It also functions as a nice component of salad dressings.

3. Miso paste
Like soy sauce (another fermented soy product), miso paste possesses real umami-boosting power.  Think beyond miso soup and use this flavorful ingredient as part of a rich sauce:

Whisk two to three tablespoons miso paste with one cup of water and a tablespoon (or more, depending on desired thickness) of almond or cashew butter.

Serve sauce on top of a cooked quinoa or millet with sauteed or steamed vegetables for an easy, healthy lunch or dinner.

Mix and match
Try sauces, salad dressings, and soups that include a combination of two or more of these ingredients to really kick up the umami flavor in your cooking.

Easter sushi

We kicked our Easter off with a relatively low-key breakfast and Easter baskets.  I discovered yet another reuse for receiving blankets — the small, pastel-colored blankets make a nice basket liner, without the mess of Easter grass (bonus points if the blankets happen to have bunnies on them!).

IMG_1625

Someone got creative with his Easter bonnet.

Later in the morning, we headed over to Matt’s dad’s house for a traditional Easter brunch.  I realized as we were in the car driving that the timing (and weather) was such that we could have attempted our first South City to Webster Groves bike ride with Gabriel — another time, I guess.

The fabulous spread included a fritatta, a Parmesean artichoke quiche, waffles with blueberry sauce,  and fresh fruit.  And then there was dessert — sour cream coffee cake and lemon coconut cloud cake.  I don’t need to look too far to see where Matthew gets his penchant for baking.

Anyway, the mother and sister of one of the other brunch guests are in Japan, and we guessed that their Easter brunch may have included sushi.

After a post-brunch nap, Gabriel was ready for some egg hunt action.

???????????????????????????????

Back home, Gabriel and I hung out in the yard, while Matthew worked on bread, including a variation on our chocolate cherry bread.  I snapped some more pictures of Gabriel in his Easter best (vest: one American dollar at the SVdP thrift store).

IMG_1690

That night, looking for a light and healthy dinner option after the rich brunch,  I remembered an idea I had for sushi filling (based on a snack I made for Gabriel a few days prior).  I’d actually forgotten about our brunch conversation, and that Easter sushi connection, until I sat down to write this post.

I’ve already done non-traditional rice for sushi, so why not experiment further?

IMG_1693

Our Easter dinner: sushi and Asian-inspired salad with garden-fresh purple cabbage and mache lettuce.

Rice millet sushi

Ingredients
1 c. cooked rice (I used a red variety)
1/4 – 1/3 c. puffed millet [cereal] OR 1/2 c. cooked millet
2 T. almond butter
2-3 T. tomatillo salsa OR 1 T. seasoned rice vinegar
1 t. olive oil
3-5 Nori seaweed wrappers
Avocado, carrot, radish, etc., thinly sliced for rolling
Soy sauce and wasabi for dipping

Directions
Mix the top five ingredients.  Spread a thin layer on the non-shiny side of the nori sheet and place other fillings on top (see here for more detailed instructions) — don’t overdo it on the fillings, or your roll will fall apart.

Roll, dipping your fingers in water as you work, let the roll sit for a couple of minutes, and slice with a sharp knife.  Serve with soy sauce and wasabi paste for dipping.

Risotto gets a makeover: Easy and healthy

In my recent post on lunches, I mentioned risotto, with the promise for a recipe soon.  I had to look back through my archives to make sure I hadn’t already shared the recipe here.

Turns out, this was NOT the first time I mentioned my risotto method — the previous instance occurred over two years ago, in December 2010.  At that time, I also said I would post the recipe, yet a search of my archives shows zero risotto recipes.  Let’s call it pregnancy brain, shall we?

If you’ve been waiting over two years for my top-secret-easy-and-healthy risotto recipe, I do apologize.  If you’ve only been waiting since last week, think how good you have it!

The secret to my risotto is using oat groats instead of the traditional arborio rice.  Though they sound like something a horse (or a goat?) might eat, oat groats are simply the whole oat grain — what they steam and flatten to make rolled oats.  It looks like a wheat berry.

So, why use oat groats?  Well, nutritionally, you get the health benefits of whole grain oats, with a good serving of heart-healthy fiber.  While this is not a fat-free, or even necessarily a low-fat recipe, the natural creaminess of the starch in oats produces an effect similar to arborio rice, and you can have a very rich tasting dish without having to add too much fat.

While oat groats take just as long, if not longer, to cook than arborio rice, they require less babying.  Traditional risotto has you standing at the stove stirring the whole time, gradually adding small amounts of hot broth every now and then.  With oat groats, after toasting the grain for a few minutes, you can toss in the broth, bring it to a simmer, cover it, and walk away.  Sure, you’ll have to come back every now and then to give it a stir, but it’s not a big deal.

IMG_8329

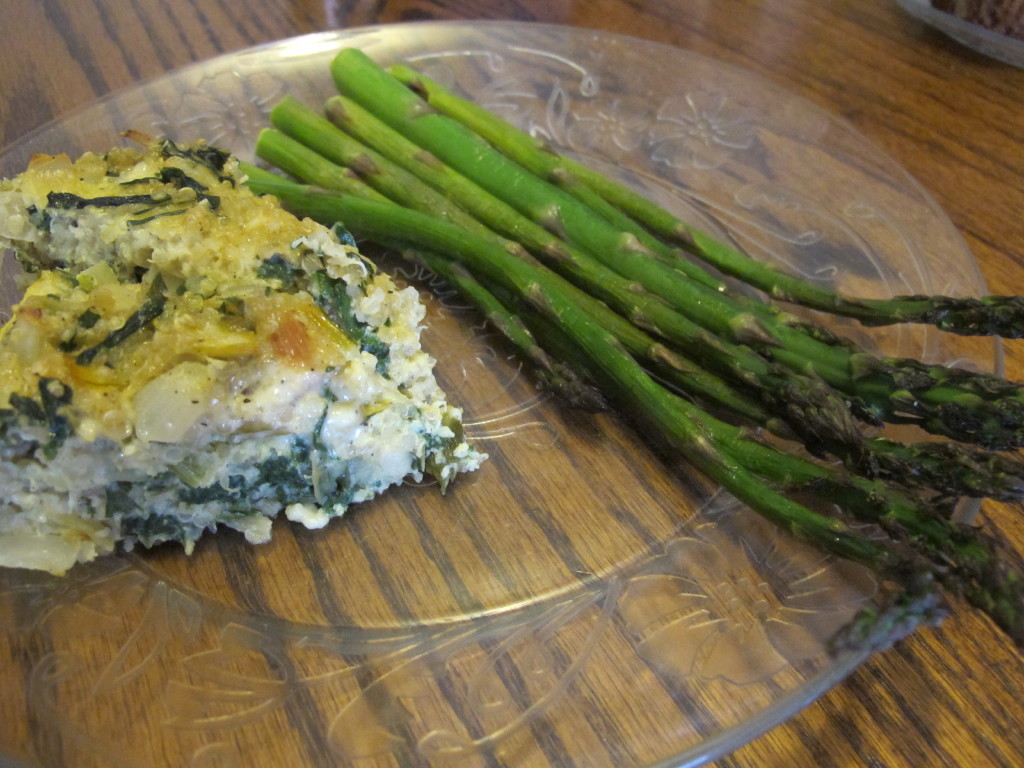
Butternut squash and asparagus risotto

Recipe by Melissa

Ingredients*
1 1/2 cups thinly sliced leeks (or sub. diced onions)
2 T. butter
2 T. olive oil
1 1/2 cups oat groats
5 c. vegetable broth
8-12 saffron threads
1-2 c. cooked butternut squash
2 c. asparagus pieces
1 c. frozen peas (optional)
salt (to taste — amount will depend heavily on how salty your broth is)
1/3 c. nutritional yeast
1/2 c. freshly grated Parmesean cheese

Directions
Melt butter over low heat in large sauce pan.  Add leeks, and cook gently until softened, 10-15 minutes.  Add olive oil and 1/2 t. sea salt.  Add oat groats, increase heat to medium, and cook for 5 minutes to lightly toast the grain.

Add 3c. broth and the saffron — broth can be hot or cold, but if you start from hot, it will speed things up a bit.  Bring to a boil, then reduce heat to maintain a gentle simmer while covered (the oat groats will need to simmer for a total of 60-90 minutes).

After 20 minutes, add the butternut squash.  You want it to dissolve into the risotto, adding to the depth and richness of the dish.

At this point, the risotto should be thickening nicely.  You may need to stir it a bit more frequently now.  Add the nutritional yeast, and more broth if necessary.

After 60 minutes of simmering, check tenderness of the grain, it should be chewy, but tender.  If it’s close to ready, add the asparagus and peas.  Maintain a gentle simmer for 10-15 more minutes.  When vegetables are tender and cooked through, remove from heat and stir in the grated Parmesean cheese.  Season to taste with salt and pepper.

*Ingredient variations are pretty much endless. The picture above is actually a sun-dried tomato and leek [oat groat] risotto, originally mentioned here.