Color your Valentine with beets: Using natural dye to make pink frosting

While I generally prefer to let the color of my food speak for itself, I’ve long been curious about using real food instead of food coloring.*

With the holiday of pink and red right around the corner, I set out to make some edible Valentine’s — heart-shaped gingerbread cookies with beet-pink buttercream frosting.

IMG_1486

A little digging uncovered two main approaches to using beets to color frosting: 1) juice the beets or 2) stir chunks of beets (which can easily be removed when their work is finished) into the frosting.  We don’t have a juicer, so option number two was the obvious winner.

I headed to the kitchen, where I thoroughly washed my freshly harvested beet, then cut half of it into ten small chunks.  I tossed a few chunks in with my white buttercream and began to stir.

After a few minutes, I saw some results, but realized that partially cooked beet chunks would yield more juice, and thus more color.  I tossed six of the chunks into a ramekin, added a teaspoon of water, and microwaved it (covered) for a minute or so.

The result?  Slightly tender beet chunks and a bit of vivid pink beet juice.

After cooling, I tossed the cooked beets and a bit of the juice into my frosting, which obligingly turned a lovely shade of pink.

IMG_1483

For the frosting, I used our basic tried-and-true buttercream recipe, with equal weights butter and sifter powdered sugar, plus vanilla and almond extracts.  Half of a smallish beet produced the color here for a recipe with a pound of butter and a pound of powdered sugar.

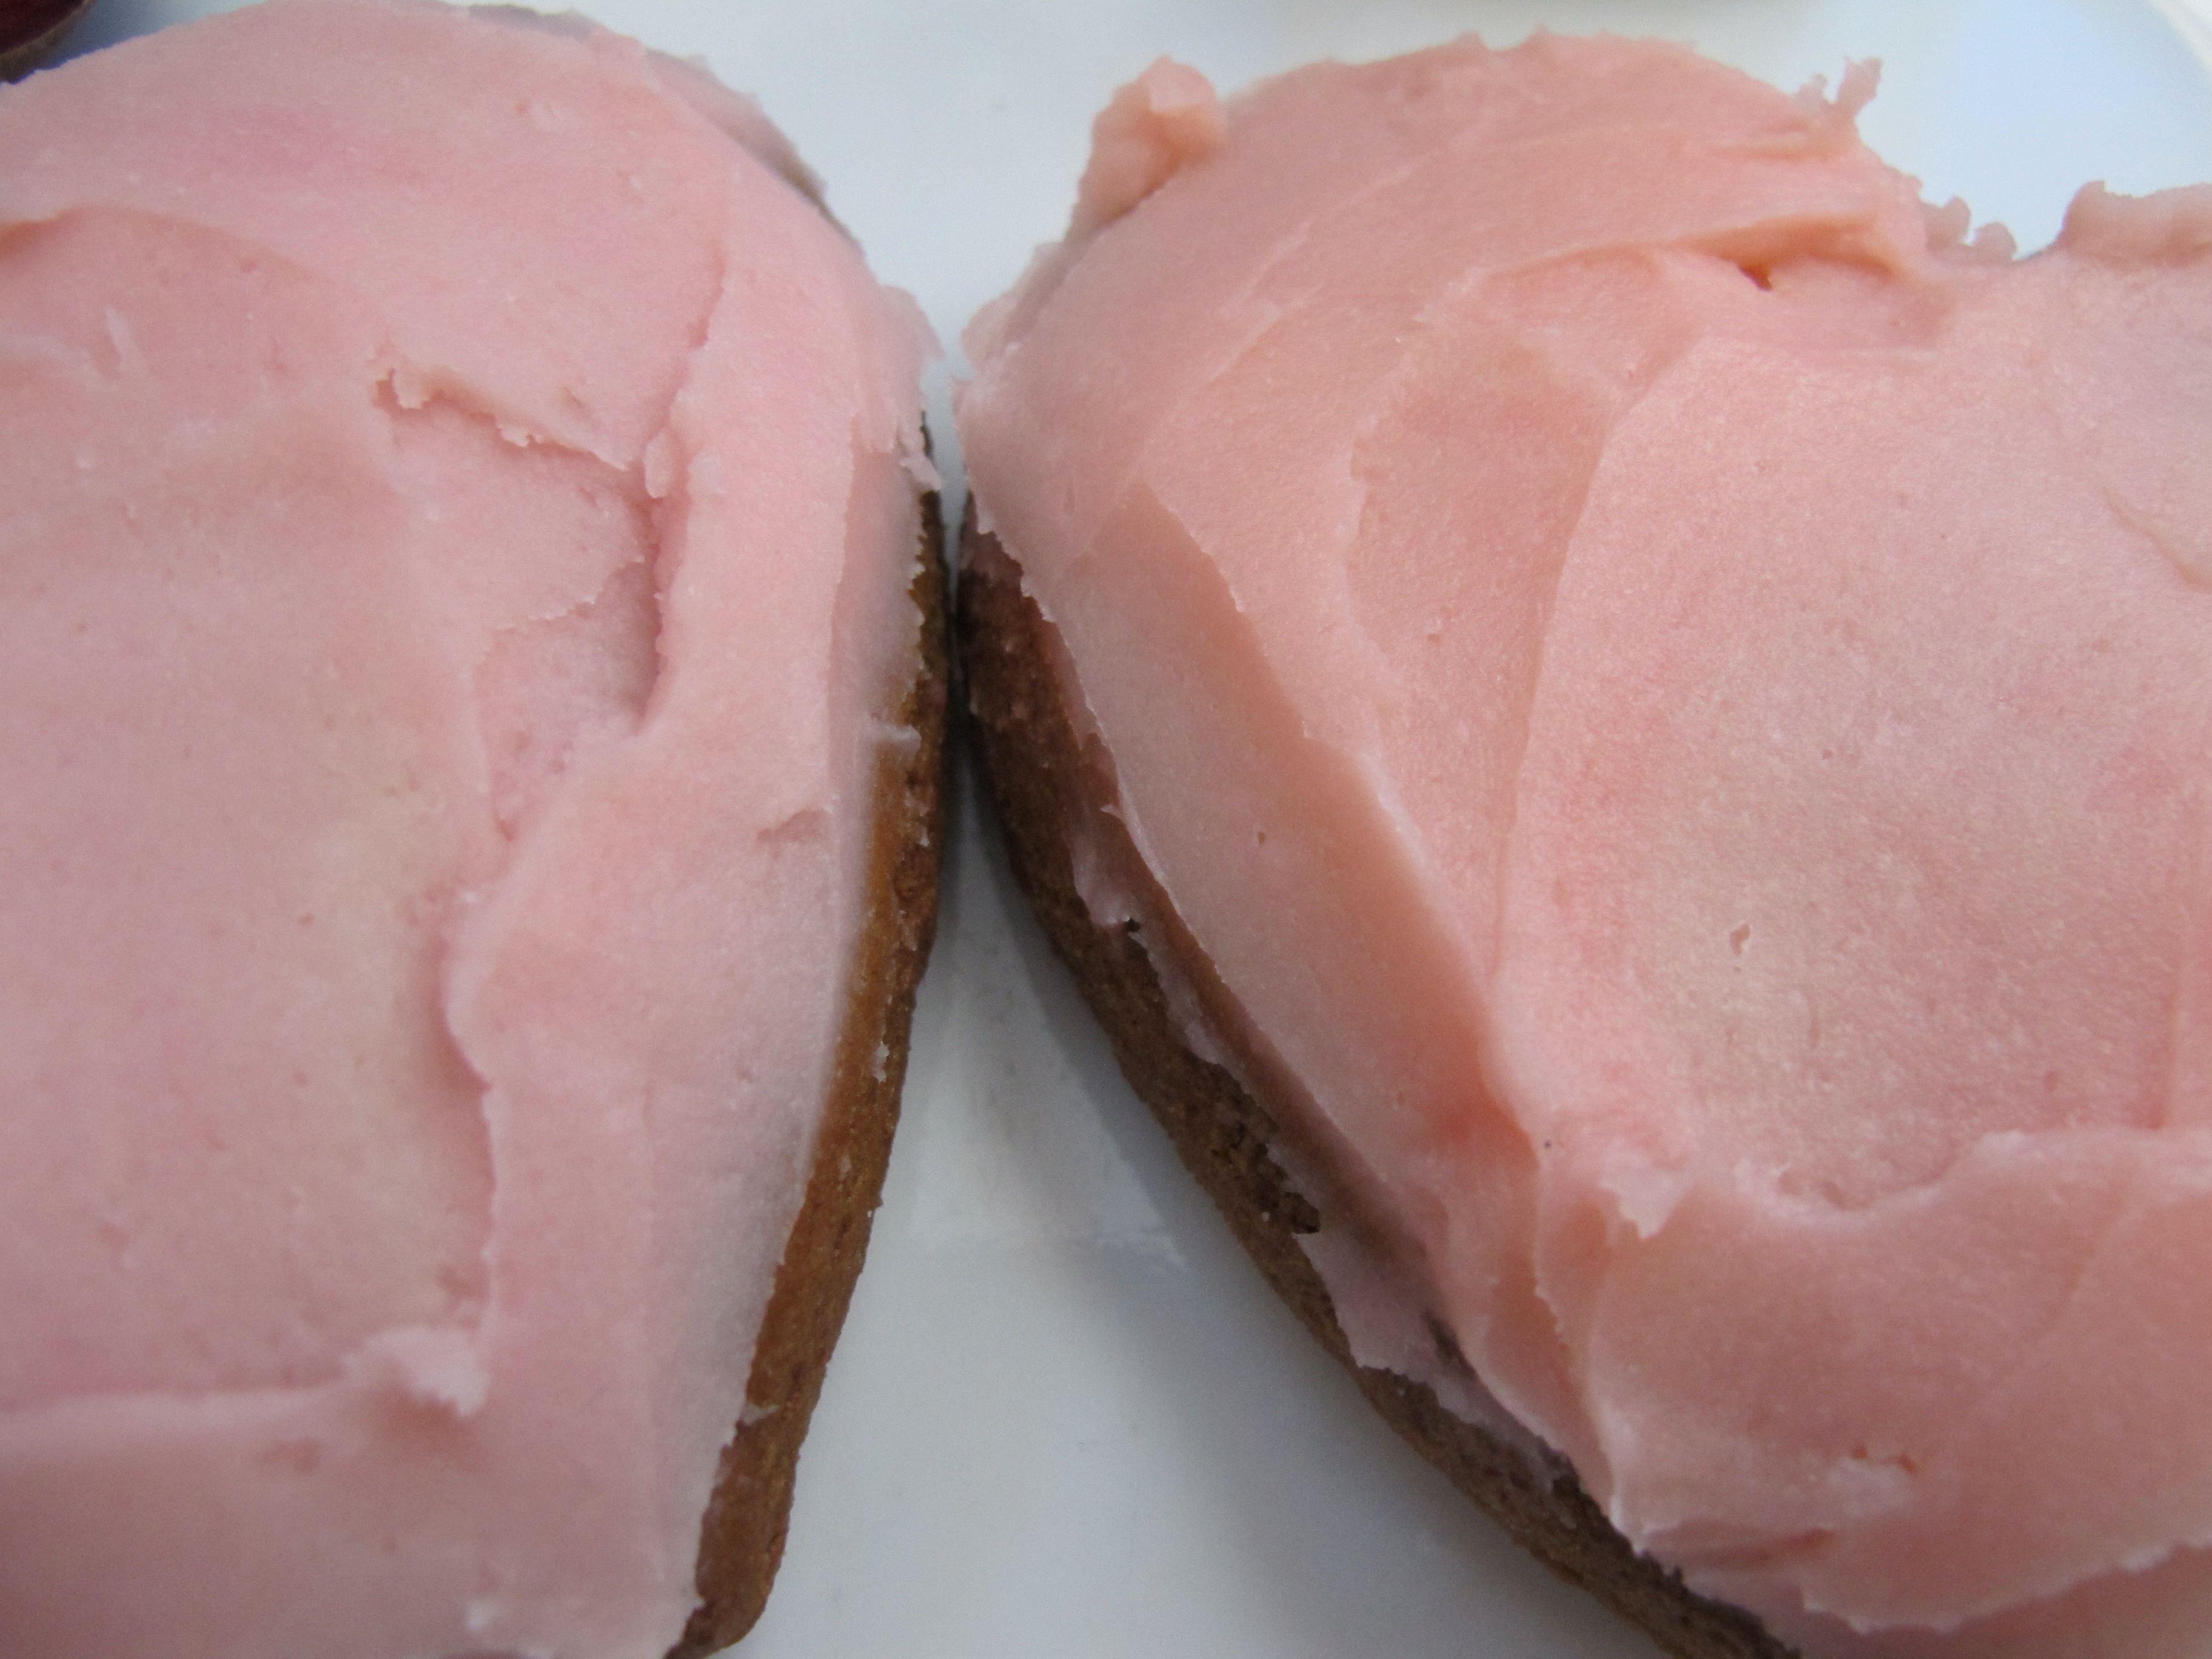
For comparison, I had a small amount of frosting colored with good ol’ Red #40 and Red #3: beet on the left, artificial coloring on the right.

IMG_1487

In case you’re wondering, you can’t taste the beet at all.

Happy [almost] Valentine’s Day ❤

*While consuming small amounts of artificial food dye is probably not a big deal, I prefer to avoid them as much as possible, and, frankly, really deep-colored frosting with tons of dye just tastes disgusting.

Sweet taters

While I’ve written quite a lot about our winter squash over the past couple of years, I’ve neglected the humble, but delicious, sweet potato.  While winter squash are great, they require scooping out the goop, and you often don’t know exactly what you’re going to get until you cook it.

In comparison, sweet potatoes require less prep, and they are consistently delicious.

IMG_1424

To give you a sense of scale, the knife in the sweet potato has a 6.5 inch blade.  This big guy weighed in at just under five pounds.  It really looked like it could have easily weighed ten pounds, but, while nice and solid, the flesh of a raw sweet potato is relatively dry.

We store them dirty (they keep better that way), so they all need a good bath and a bit of a scrub.  I soak the whole potatoes in a bowl of water to loosen the dirt, then use an old toothbrush to scrub them clean under a very small stream of running water.

Here are some smaller roots, immediately after harvest.  Matthew dug about 200 pounds of sweet potatoes from 10-12 plants last October.  These sustained shovel damage, so we used them immediately.

IMG_0679

The dry flesh of the raw sweet potato yields a rich, creamy product when cooked.  My favorite, easy prep method these days involves roasting.

roasted sweet potatoes

Recipe by Melissa

Ingredients
Sweet potatoes
Olive oil
Salt

Directions
Preheat the oven to about 400°F.*  Thoroughly clean the sweet potatoes, as described above.  Cut into similar size cubes (you can go smaller or larger depending on the final use, but similar size is important for even cooking).

Place the sweet potato cubes in a large, oven-safe, covered dish (I use a large Pyrex casserole) and toss with olive oil and salt.  Put the covered dish in the oven and roast the potatoes for 40-55 minutes, stirring halfway through.

Serve as a fabulous side dish, or toss into one-dish meals, soups, or wraps.  I often use sweet potatoes in place of carrots in this soup, and they substitute well in other recipes.

*Temperature is flexible +/- fifty degrees or so if you have other food that needs a specific temperature.   Roasting time may increase or decrease accordingly.

Our normal posting has been disrupted by an asteroid

Back in August, when I met up with Nupur of One Hot Stove to chat, introduce our little ones, and swap some food, she and I were both adjusting to [what I thought would be] a temporary stint as SAHMs.  Nupur made some comment to the effect that, contrary to what those who have not been in the role might believe, we weren’t sitting on the couch and eating bonbons all day.

Unfortunately, Sir’s current stage — clingy/fussy/teething/crazy/strong-willed hot mess of toddler — leaves me with little energy to do much more than collapse on the couch come nap time or bedtime, regardless of whether or not there are any bonbons in reach.  To paraphrase a quote from the movie Armageddon, it recently feels like I spend my days with a “vicious, life-sucking bitch little dude, from which there is no escape.”

IMG_1445

No energy for the extras, like blogging or prepping baked oatmeal in the evening so it’s ready to pop in the oven in the morning.  I’ve been wanting baked oatmeal for about forever now but have been stuck with stove-top oats, which, when I really want to get the day off to a special start, I turn up too high and neglect for just long enough to have a mess of sticky, cooked-on oatmeal goo all over the outside of the pan and top of the stove.

I know (or I hope?) that this is only a phase, and eventually things will get a bit easier, but at the moment, it’s difficult to get post ideas out of my head and onto the blog.

I have a number of food-related posts in the works, including our carrot taste-test and resulting recommendations of good carrots to grow (at least for our local growing conditions); a lentil [meat]ball recipe that is still a work in progress, but quite good in its current rendition, especially when served the pasta alternative that I stumbled upon at lunch today; and my favorite easy way to cook our [really huge] garden sweet potatoes.  Meanwhile, Matthew is working on a couple of garden-related how-to posts, since spring is right around the corner.

Thanks for staying with me through this slow posting period!

Eats and rides

Just over a week ago, I bundled Sir into the trailer for a very cold trip to the park,  one that had me questioning my judgement and worrying about frostbite on tiny fingers.  He seemed fine with the outing, but I think he might not realize how cold he was until it was too late.  After a bit of walking and one trip down the frosty slide, I bundled him back into the trailer and hightailed it home.

Two days later, we were out again, with temperatures in the fifties — you know, normal January weather.  Sir rode in the IBert, and we biked to the coop-style farmers’ market where we buy eggs.   Of course, the warm weather came with strong southerly breezes, which asserted themselves on the way home.  Let’s just say I got a good work out.

The weekend brought a few more rides, along with much cooking.  These baked “everything” nachos were actually last Thursday’s dinner, along with some homemade guacamole: tortilla chips layered with refried beans, sauteed onion, cabbage, and sweet potato, salsa, and cheese.

IMG_1389

On Saturday, we hosted a small gathering for my father-in-law, and Matthew made a delicious apple crisp.  Once our guests left, I cranked it into high gear to have dinner ready by 5:30 (about the latest we can eat if we’re all going to eat together, given Sir’s bed time).  Fortunately (and miraculously), this Moroccan Lentil Soup (inspired by Stacey’s recent post) came together quickly, and Matthew worked on the bagna cauda, which we spread on bread to round out the meal.

Sunday brought another colder solo bike ride before the really cold weather hit to start the week.  Since then, I’ve been hibernating, eating leftovers, and wrangling a crazy teething monster.  Yep, Sir is cutting his two-year molars (at eighteen months, of course).  As soon as I saw the teeth under the gums, I reminded him of our deal that after he finishes teething, there is no more fussing allowed, EVER.

The monster in my kitchen

I’ve been planning to write about finding my balance with where I am in life and being in a good place, but starting about a week ago, Gabriel turned some corner into a [hopefully short-lived] developmental stage known as “Horrible.”  I’m pretty sure it manifested before his fall, but I’m not positive, and I can’t help but wonder if he knocked a few screws loose.

Anyway, he’s been very clingy and needy, making it difficult for me to get much of anything done, but it’s been particularly frustrating in the kitchen.  Turns out, it’s rather difficult to chop vegetables with a large, sharp knife, and deal with hot pans on the stove-top and in the oven, when a fussy toddler is pulling on your legs, shirt, etc.  Not to mentioned dangerous.

I gave up before I started on a couple of evenings, too sapped from dealing with him earlier in the day and anticipating his antics to even try.  Leftovers to the rescue!

At my MIL’s suggestion, I tried putting him in his booster seat with some toys while I cooked (farinata, with a side of sweet potatoes and turnip greens, if you were wondering) last night, and it went surprisingly well.

Despite my misgivings about confining him like that, he actually seemed content to be sitting in the kitchen doing his own thing, playing and babbling with very little input from me, in contrast to the frantic whining and wrapping himself around my legs of previous afternoons.

Eventually, I plan to let him help more in the kitchen, but we’re not quite there yet.  Last week, I experimented with helping him stand on a chair and sift flour and stir the dry ingredients for raw apple cake.

It went well — flour more or less stayed in the bowl, he didn’t fall of the chair and crack his head on the tile flour, and he seemed to enjoy helping.  However, it required very close and constant supervision on my part, definitely not something I have time for every night.

If any of you have suggestions for occupying young toddlers while cooking and/or safe ways (easy and not TOO messy would be great, also) to involve toddlers in the kitchen, I’d love to  hear them.